Restaurantstyle Chilli Paneer Crispy Cubes in a Fiery Glaze
- Unlocking the Secret to Authentic Indo-Chinese Flavour Bombs
- Why This Chilli Paneer Recipe Beats Takeout Every Time
- Curating Your Pantry for the Ultimate Chilli Paneer Base
- The Essential Components: Paneer Preparation and Coating Mix
- Phase One: Achieving Golden, Non-Negotiable Paneer Crunch
- The Wok Action: Mastering the Fiery Toss Technique
- Pro Tips for Next-Level Chilli Paneer
- Customizing Heat and Texture: Variations on the Classic
- Recipe FAQs
- 📝 Recipe Card
Unlocking the Secret to Authentic Indo Chinese Flavour Bombs
Welcome to the world of fusion cuisine where vibrant Indian dairy meets the fiery finesse of the Chinese wok. We are about to demystify the creation of truly exceptional Chilli Paneer .
This dish, a true icon of the Indo Chinese culinary scene, balances sharp acidity, deep umami, and a thrilling burst of heat, all coating beautiful, resilient cubes of fresh cheese.
Forget those pale imitations you find sometimes; this guide focuses on achieving that deep, complex flavour profile and the perfect textural contrast that defines the best versions of this classic.
Why This Chilli Paneer Recipe Beats Takeout Every Time
The reason homemade food always wins is control. When you follow this comprehensive Chilli Paneer Recipe , you control the quality of the ingredients, the exact level of spice, and most importantly, the textural integrity of the cheese.
Most delivery services struggle with the primary challenge of this dish: keeping the paneer crisp while drowning it in sauce. We will conquer that challenge through meticulous preparation, ensuring your Homemade Chilli Paneer delivers an explosive, satisfying crunch every single time.
The Magic of Manchurian Glaze: Sweet, Spicy, Sticky Perfection
The heart of any great Chilli Paneer Gravy Recipe lies in its glaze. This isn't just a thin coating; it’s a thick, glossy reduction built on the trinity of soy, vinegar, and just enough sugar to temper the chilli heat.
We aim for a sticky consistency that adheres beautifully to the fried surface of the paneer. Achieving this "Manchurian Glaze" requires precise timing during the final toss, ensuring that every element the sweet ketchup, the salty soy, and the tang of vinegar works in perfect synergy.
A Fusion Masterpiece: Where India Meets the Wok
This dish exemplifies culinary borrowing at its finest. It takes Indian staples, like soft paneer , and introduces it to Chinese techniques high-heat stir frying, the use of vinegar and soy sauce, and the cornflour slurry thickener.
This technique, often referred to when describing Hakka Paneer , is what gives the dish its unmistakable aromatic foundation, relying heavily on fresh ginger, garlic, and those crucial diagonal cuts of green chilli that look as good as they taste.
Setting Expectations: Crispy Paneer, Never Soggy
The difference between mediocre and magnificent Restaurant Style Chilli Paneer hinges entirely on the preparation of the cheese itself. Paneer is inherently moist. If you skip the draining and battering steps, you end up with cheese that steams rather than fries.
Our method focuses on creating a robust outer shell for the paneer cubes before they even meet the wok, setting the stage for success in both the Chilli Paneer Dry Recipe and the saucier versions.
Curating Your Pantry for the Ultimate Chilli Paneer Base
Before we even think about turning on the stove, setting up your ingredients is paramount. This is a fast paced dish once you start frying and tossing, meaning you won't have time to measure sauces mid-sauté. Proper mise en place is the bedrock of any successful stir fry.
The Essential Components: Paneer Preparation and Coating Mix
We need 400 grams of paneer, ideally cut into uniform 1 inch cubes. The key is surface area management; dry surfaces absorb batter better and fry more evenly.
Sourcing high-quality Paneer for Frying Success
Always start with paneer that isn't overly watery. If you buy it vacuum packed, drain off the liquid and gently press the block between two plates lined with paper towels for about fifteen minutes. This slight drying process is non-negotiable for achieving a good exterior crust.
The Triple Threat: Essential Sauces for Depth of Flavour
For the sauce base, we rely on the classic trio: Soy Sauce for saltiness and umami, Tomato Ketchup for a subtle sweetness and tang, and a good quality Red Chilli Sauce (Sriracha works well, or a dedicated Chinese chilli paste) to bring the heat.
Don't forget a splash of vinegar rice or white to cut through the richness. These components, mixed with water or stock, sugar, and set aside, form the cohesive flavour profile of our glaze.
Aromatics and Vegetables: Building the Stir Fry Backbone
The supporting cast is vital for texture and aroma. We need heaps of finely minced garlic and ginger these are the backbone of the Chilli Paneer Ingredients aromatic base.
For vegetables, we use large, chunky squares of onion and bell peppers (both red and green) so they hold their shape during the high heat toss. Finally, separate your spring onions: the white parts go in early for flavour, and the vibrant green tops are reserved strictly for garnish.
Creating the Signature Crisp: Batter Ratios Explained
This is where many recipes fall short. We need a batter that adheres thickly but remains light. We combine approximately half a cup of cornflour with a quarter cup of all-purpose flour, seasoned simply with salt and pepper. The crucial element is adding water slowly.
You are aiming for a thick, smooth coating batter it should resemble heavy pancake mix, clinging heavily to the paneer cubes without dripping off entirely.
Related Recipes Worth Trying
- Best RestaurantStyle Chilli Paneer Recipe Crispy Glossy — Tired of soggy paneer This authentic Chilli Paneer recipe delivers perfectly crisp cubes coated in a fiery sticky IndoChinese gravy Get the secret steps here
- Best Chilli Recipe Proper PubGrub Beef Chilli Con Carne — Craving a proper chilli recipe This hearty beef chilli con carne is inspired by British pubgrub Slowcooked flavourpacked and easy Get the recipe now
- Healthy Blooming Onion with Chilli Cheese Sauce: Easy Guilt Free Appetizer! — Looking for a delicious and healthy blooming onion with chilli cheese sauce? Discover how to make this guilt free appetizer with our simple recipe. Try it...
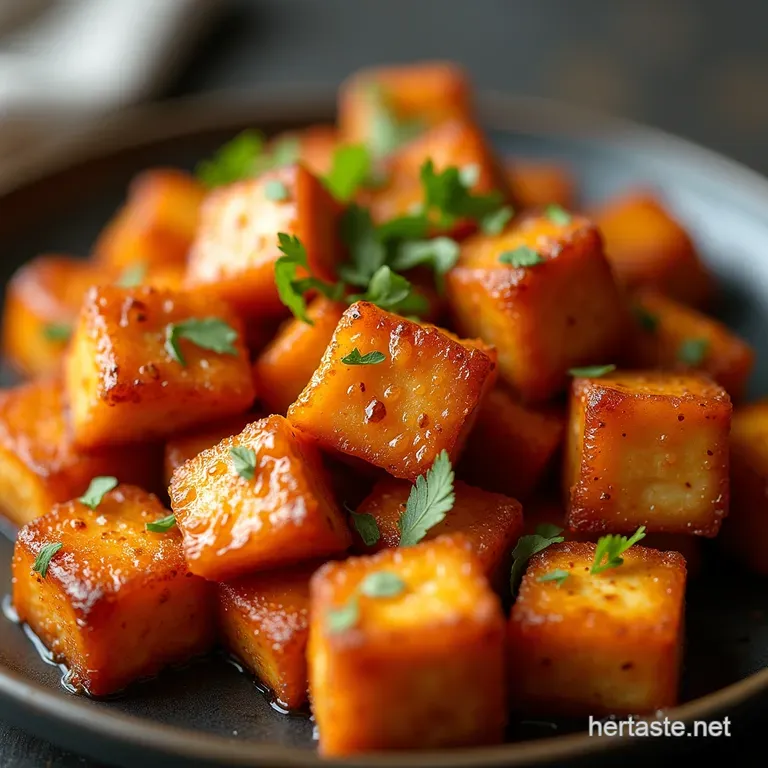
Phase One: Achieving Golden, Non-Negotiable Paneer Crunch
The cooking process begins with the paneer. Frying is the best method for that authentic outer texture, although an Chilli Paneer Air Fryer adaptation is possible for a lighter result (though the deep fry method yields superior crust).
Heat a neutral oil, like canola or sunflower, until it reaches about 350° F ( 175° C). Working in small batches is crucial; overcrowding the pot drops the temperature dramatically, leading to oil absorption and soggy paneer.
Fry each batch for 3 to 4 minutes until they achieve a light, even golden colour. Remove them immediately to a wire rack, not paper towels, as the rack allows air circulation, preventing steam from softening the underside.
The Wok Action: Mastering the Fiery Toss Technique
Once your paneer is resting, it’s time for the fast paced assembly. The wok must be blazing hot this is non-negotiable for Easy Chilli Paneer .
step-by-step: Coating the Paneer Cubes Thoroughly
Ensure every paneer cube is completely encased in that prepared batter. If the batter seems too thick, add a tiny drop more water; if too thin, dust with a bit more cornflour. Gently place the battered cubes into the hot oil, ensuring they don't stick to each other immediately.
Temperature Control: Frying Secrets for Maximum Crispness
For the absolute crunchiest texture, employ a double fry method. Fry them initially until pale gold, remove them for five minutes, and then return them to slightly hotter oil (closer to 375° F/ 190° C) for a final 60 seconds until deep golden brown.
This locks in the crispness beautifully.
Building the Sauce Hierarchy: From Sauté to Simmer
In your very hot wok, heat your stir fry oil. Add the minced garlic, ginger, and the white parts of the spring onions. Stir them violently for just thirty seconds until the aroma blooms be careful not to scorch the garlic.
Next, toss in your chunky onions and peppers, along with the sliced green chillies, and stir fry rapidly for about ninety seconds. They must retain some snap; we are not stewing them. Immediately pour in your pre-mixed sauce base (soy, vinegar, ketchup, sugar, stock). Bring this mixture to a rolling boil.
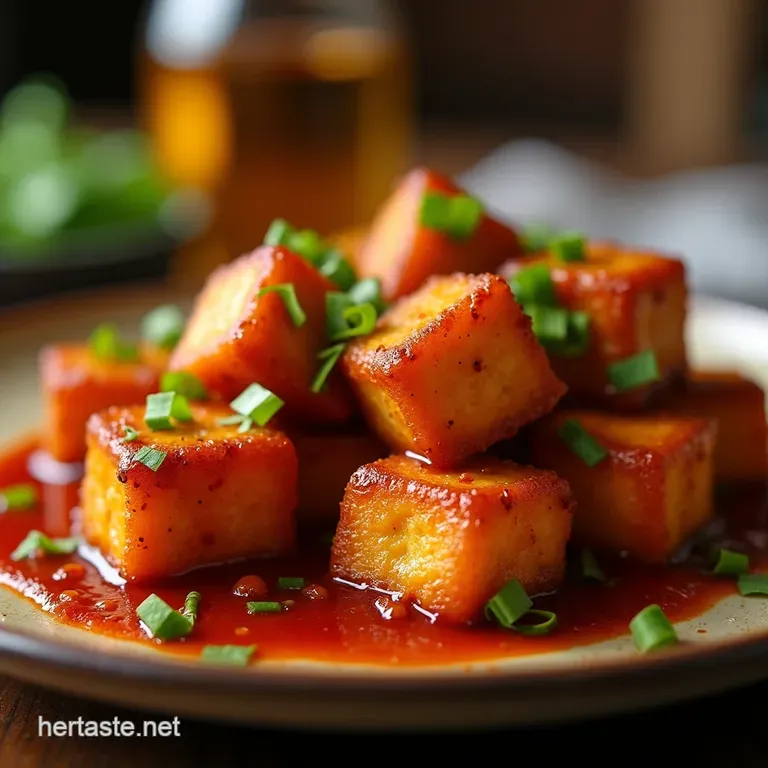
The Grand Finale: Combining Paneer and Glaze Without Losing Texture
As the sauce boils, whisk your cornflour slurry (1 Tbsp cornflour mixed with 2 Tbsp cold water) one final time and stream it slowly into the bubbling sauce while stirring continuously. It will thicken into that signature glossy glaze instantly. At this exact moment, introduce your perfectly crispy paneer cubes.
Toss everything together with swift, upward movements for no more than thirty seconds. The goal is coating, not cooking further. Garnish heavily with the reserved green spring onion tops and serve immediately.
Pro Tips for Next Level Chilli Paneer
To truly elevate this dish, consider the sourcing of your soy sauce; a good quality dark soy sauce used alongside the standard light soy will lend a deeper, more authentic colour and flavour to the glaze.
Also, remember that the heat from the wok continues cooking the vegetables even after you remove it from the burner, so always undercook them slightly during the stir fry stage.
Customizing Heat and Texture: Variations on the Classic
This dish is incredibly adaptable based on your flavour preferences, whether you lean towards a thick, saucy coating or prefer a lighter glaze.
Troubleshooting: How to Prevent the Paneer from Getting Rubbery
If your paneer emerges chewy, it’s usually one of two culprits: either you over fried it after the batter was applied, or you let the final dish sit too long before serving. The toss in the wok must be swift to maintain that soft interior against the crisp exterior.
Storage Solutions: Keeping the Leftovers Taste Fresh
If you must store leftovers, keep the paneer and the sauce separate. Store the fried paneer in an airtight container in the refrigerator. When reheating, toss the paneer with a tiny splash of water and reheat briefly in a hot, dry pan before adding back a freshly made, thinned down sauce.
This revives the texture significantly.
Creative Pairings: Beyond Plain Rice (Think Garlic Naan or Frankie Style)
While steamed rice is the traditional partner, this rich, flavourful curry is phenomenal spooned over a bed of Chinese style fried rice or even used as the main filling inside a warm, flaky Garlic Naan wrap, creating a fantastic, messy Chilli Paneer Frankie .
Elevating the Dish: Substituting Ingredients for Dietary Needs
If you are avoiding dairy, firm or extra firm tofu pressed aggressively works as a near perfect substitute for the paneer in this application. For those avoiding gluten, simply ensure your batter uses only cornflour (or gluten-free all-purpose blend) and use tamari instead of standard soy sauce to maintain that essential umami anchor.
Enjoy the process this Chilli Paneer Recipe is guaranteed to become a regular staple in your rotation!

Recipe FAQs
How do I stop my Chilli Paneer from getting soggy right after I toss it in the sauce?
Ah, the eternal struggle! The secret lies in three things: ensuring your paneer is double fried for maximum crunch, making sure your vegetables are only stir fried until they have a good bite (not floppy), and finally, the toss itself must be lightning fast over high heat.
Don't let the coated paneer sit in the glaze for more than 30 seconds before plating up.
I'm new to this; can I make this Chilli Paneer without deep frying? I’m worried about the oil.
Absolutely, we can save a few bob on the cooking oil! Instead of deep frying, you can shallow fry the battered paneer cubes in about half an inch of hot oil until golden on all sides, flipping them carefully.
Alternatively, for a healthier approach, toss the battered cubes lightly in oil and air-fry or bake them at 400°F (200°C) until crisp.
My sauce isn't quite sticky enough; what went wrong, and how do I fix it next time?
It sounds like your cornflour slurry didn't quite do its job! Remember, you need to mix the cornflour with cold water first to prevent lumps, and then pour it in only after the sauce is already simmering briskly.
If it’s too thin mid-cook, quickly whisk a tiny bit more slurry and add it drop by drop until you get that beautiful, glossy sheen characteristic of good Indo Chinese food.
Can I prep components of this dish ahead of time? I’m planning a big dinner party.
Yes, prep is your best mate for high heat cooking! You can cube the paneer, chop all your vegetables, and mix the sauce ingredients (excluding the cornflour slurry) a good few hours in advance. Keep them separate and chilled.
The only things you must do right before serving are fry the paneer and execute the final, quick stir fry.
How can I adjust the heat level in this Chilli Paneer recipe? I prefer mild flavours.
That’s an easy tweak, no bother at all. For a milder version, significantly reduce the fresh green chillies, perhaps using just one or two for flavour rather than heat. Also, use a milder chilli sauce (like a sweet chilli sauce) instead of Sriracha in the main sauce mix.
You'll still get that lovely chilli flavour without setting off any smoke alarms!
What’s the best way to store leftover Chilli Paneer, and can I reheat it without ruining the texture?
Store leftovers in an airtight container in the fridge for up to three days. However, be warned: the paneer will soften significantly as it cools. To reheat, the best method is to spread the leftovers on a baking tray and flash them under a hot grill (broiler) for just a minute or two to crisp the outside back up before serving alongside fresh rice.
Crispy Chilli Paneer Recipe

Instructions:
Nutrition Facts:
| Calories | 490 Calorie |
|---|---|
| Fat | 30g |
| Fiber | 4g |
