Deviled Eggs: Our Quintessential Recipe for Flawlessly Smooth Filling
Why These Aren't Your Grandma's Dry Deviled Eggs
Let’s be honest. We’ve all been there. You grab a deviled egg at a picnic, take a bite, and immediately regret it. The yolk filling is dry, grainy, and tastes faintly of sadness. Or maybe you get that terrifying grey and green ring around the yolk a literal sign of overcooking and poor technique.
It’s criminal, really. Deviled eggs are supposed to be the ultimate creamy, tangy bite, the perfect vehicle for smoky paprika and a touch of something sharp.
My mission here, my friend, is to rescue you from those culinary tragedies. The best deviled eggs recipe isn't about fancy ingredients; it's about perfect technique, especially when it comes to the boiling and the blending.
We are aiming for a flawless smooth texture that practically melts on your tongue.
The Magic of Texture: Achieving an Airy Yolk Consistency
Most people make a crucial mistake: they just mash the yolks with a fork and dump in the mayo. Stop doing that. Immediately. If you want that light, cloud and like texture, you need to introduce air and remove lumps. Think of it less like mashing and more like whipping.
The finished filling shouldn't be dense; it should be light and fluffy, almost like a savory mousse. We achieve this through two secret weapons: acid (the vinegar) and, crucially, making sure we get the yolks through a fine and mesh sieve.
It takes an extra minute, but trust me, that step is what separates the average egg from the glorious, creamy deviled eggs everyone begs you to bring to the next barbecue.
A Brief History of the Quintessential Party Nibble
You might think deviled eggs are strictly a mid and century American classic, but their roots go way back. We’re talking ancient Rome. Seriously. Romans used to boil eggs and serve them dressed with sharp sauces.
The name "deviled" only came into use in the 1700s, referring to any food prepared with hot or spicy condiments, like pepper or mustard. These days, calling them deviled eggs just sounds better than "dressed eggs," right? It suggests a bit of fire and a whole lot of personality.
What Sets a Gourmet Deviled Egg Apart?
It comes down to precision and seasoning. A gourmet egg is never chalky. It’s balanced. It has enough fat from the mayo, but that richness is immediately cut by a sharp tang from the vinegar or pickle juice. That’s the secret to making the flavor pop.
It’s also about presentation a clean, white albumen vessel holding a beautifully piped, golden filling. No grey rings allowed.
Crucial Warning: If your filling tastes flat, it needs salt and acid. Do not try to fix it by adding more mayonnaise. That just makes it heavy and bland. Be brave with the seasoning.
Essential Components for the Perfect Creamy Filling
Right then, let’s crack on with the gear and the goods. You don't need a professional kitchen, but a few simple tools will make the process painless.
The Deviled Egg Starter Kit: Tools for Success
You absolutely need a large saucepan for boiling and a big bowl for the ice bath. That’s standard. But if you are serious about achieving flawlessly smooth deviled eggs , there are two things that help tremendously.
- The Sieve: I already mentioned this. Pushing the mashed yolks through a fine and mesh sieve removes any grit or hard spots. It makes the texture unbelievably silky.
- The Piping Bag: Honestly, you don't need a fancy expensive piping kit. A simple Ziploc bag with one corner snipped off works perfectly. It gives you control, prevents messy scooping, and makes the finished product look instantly professional.
Selecting the Freshest Eggs: Age and Quality Matters
This is where the home cook gets to feel smug. Want a quick way to sabotage your peeling efforts? Use eggs you just bought today. For eggs to peel easily, they need to be slightly older ideally, 5 to 7 days old. Why?
As eggs age, the internal pH rises, which weakens the bond between the egg white and the inner membrane. That bond is why fresh eggs stick like glue. So, buy your eggs a week early and let them chill in the fridge. It’s a game and changer.
Mustard and Mayo: Dialing in the Ratio for Tangy Perfection
Forget those recipes that use a ton of yellow mustard. We’re not making ball and park potato salad here. We want something sophisticated. I always reach for full and fat mayonnaise don't even bother with the low and fat stuff; you lose too much structure and flavor.
For the mustard, Dijon is the champion; it provides a necessary bite without overpowering the delicate egg flavour.
The real differentiator is the acid. A splash of cider vinegar or, hear me out, a teaspoon of pickle juice, adds that mandatory punch that cuts through the richness.
| Ingredient | Purpose | My Pro and Tip |
|---|---|---|
| Full and Fat Mayo | Richness, binding | Must be good quality; not too oily. |
| Dijon Mustard | Tang, flavor depth | Start small, taste, and increase if needed. |
| Vinegar/Pickle Juice | Essential acidity | This is what makes the flavor pop! |
Related Recipes Worth Trying
- Classic Deviled Eggs: The Easy, Ultra Creamy Original Recipe — Classic Deviled Eggs are the ultimate easy appetizer. Get our original deviled eggs recipe for a silky smooth, perfectly seasoned filling with vinegar...
- The Ultimate Homemade Eggslut Breakfast Sandwich Recipe — Recreate that famously decadent Eggslut Breakfast Sandwich at home Master the custardy eggs and sweetsavoury jam for the best breakfast sandwich recipe...
- Foolproof hard boiled eggs My Guide to Perfection — Struggling with hard boiled eggs that wont peel This guide guarantees perfectly cooked easypeel hard boiled eggs every time Its like magic Get the secrets now
Step and by-Step Directions for Preparing Flawlessly Smooth Deviled Eggs
The steps are simple, but the timing is everything. Pay attention here.
The Cold Start Method: Guaranteed Easy Peeling
This is the secret sauce for easily peeled eggs. Instead of dropping eggs into boiling water (which often leads to cracking and sticking), we start everything cold.
You place the eggs in the saucepan, cover them with cold water, and bring them slowly to a rolling boil. As soon as the water hits that rolling boil stage, you cover the pot, turn off the heat immediately, and set the timer for 12 minutes. The residual heat cooks the eggs gently.
Once 12 minutes are up, they go straight into an ice bath for at least 15 minutes. This stops the cooking and shrinks the egg inside the shell. Peeling becomes a breeze.
Whipping the Yolk Mixture: Eliminating Every Last Lump
Once the eggs are peeled and halved, scoop out those gorgeous golden yolks. Now, mash them really well. I mean, powdery well. Then, take that extra two minutes and push them through the fine and mesh sieve into your mixing bowl. Seriously, you will be shocked by how much finer the texture becomes.
Once the yolks are refined, add your mayo, mustard, vinegar, salt, and pepper. Use a fork or a small whisk, and don't just stir actually whip the mixture a bit. You’re incorporating air, making the filling lighter, fluffier, and, most importantly, incredibly creamy. Taste test! Needs more mustard?
Needs more salt? Now is the time to adjust.
Presentation Matters: Piping the Filling Professionally
We eat with our eyes, right? Making the filling look good is part of the fun. If you don't have a piping bag, the Ziploc trick works perfectly. Fill the bag, push the mixture to one corner, twist the top to seal, and snip off about half an inch from the corner.
Hold the bag vertically over the egg white cavity and gently squeeze, starting from the outside and spiraling inward, building up a little mound or a rosette. It makes the easy deviled eggs look like you spent hours on them.
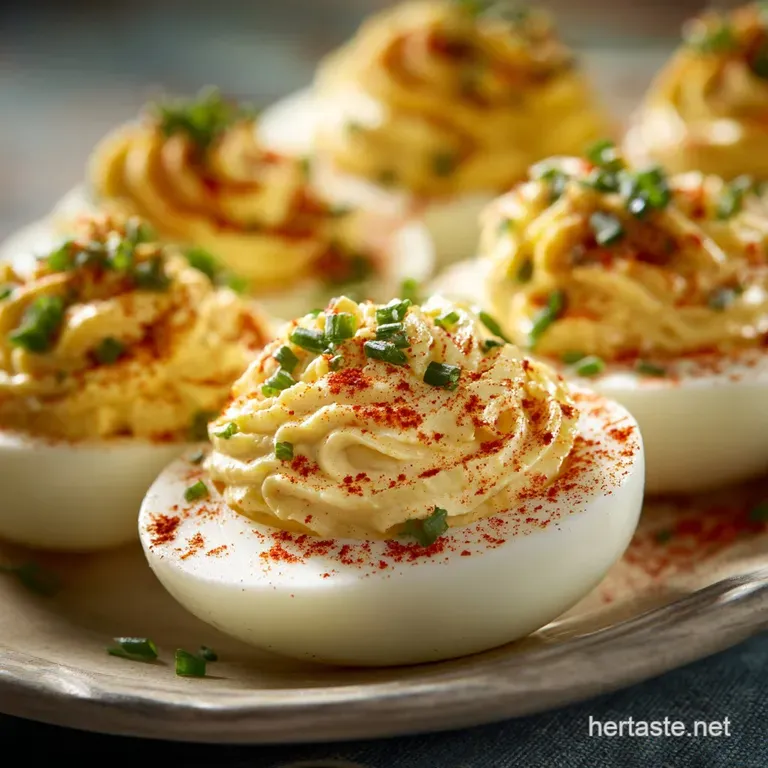
Garnish with a tiny dusting of smoked paprika and a snip of fresh chive just before serving.
Mastering Storage and Elevating Your Egg Game
Make and Ahead Strategy: Keeping Components Fresh for Transport
Deviled eggs are best when fresh, but you can certainly prep them ahead of time. I highly recommend keeping the components separate if you’re traveling or making them the night before.
- Store the Whites: Keep the peeled egg white halves sealed tightly in the fridge.
- Store the Filling: Put the yolk mixture in a sealed container or, even better, already loaded into your piping bag, twisted shut, and refrigerated.
When you arrive at the party (or just before serving), pipe the filling and garnish. This prevents the whites from drying out and keeps the yolk mixture from weeping or getting soggy.
Troubleshooting: Why is My Yolk Mixture Runny?
This is usually a fat and to-solid ratio problem. If your mixture is too runny to pipe nicely, you likely added too much mayo or too much liquid (vinegar).
How to Fix It:
- Add More Yolk: If you have extra hard and boiled egg yolks (always save a few, just in case!), mash them fine and mix them in. They act as a thickener.
- Use Mustard Powder: A tiny bit of dry mustard powder can absorb some moisture without drastically changing the flavor profile.
- Chill Time: Sometimes the filling is just warm from mixing. Refrigerate it for 30 minutes. Cold fat firms up and will help the mixture hold its shape better.
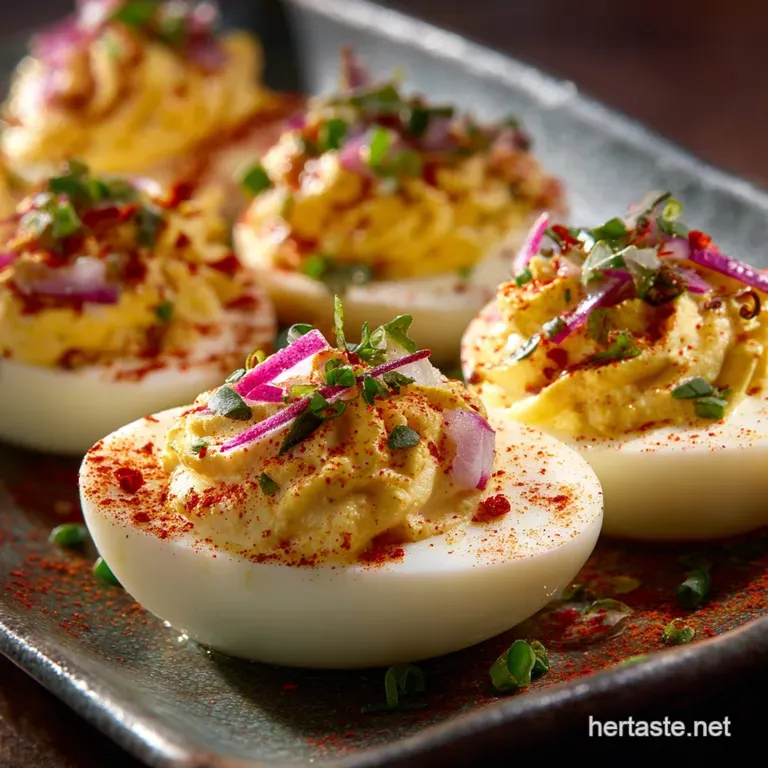
Advanced Deviled Eggs Variations: Adding Spice and Crunch
Once you master the base deviled egg ingredients and technique, it's time to play. These variations turn your classic appetizer into something truly memorable.
- Spicy Southern Deviled Eggs: Add a dash of hot sauce (like Cholula or Tabasco) to the mix and garnish with a tiny candied jalapeño slice.
- Truffle Elegance: Skip the paprika. Add a teaspoon of truffle oil to the filling and grate a minuscule amount of fresh Parmesan on top.
- Salty & Umami: Mix in a finely mashed anchovy fillet (it melts away!) and top with crispy fried capers. Divine.
- The Everything Bagel Egg: Replace the chives and paprika with a light sprinkle of everything bagel seasoning just before serving. The sesame and garlic notes are fantastic.
Quick Nutritional Snapshot
Remember, these are rich, decadent party treats. Enjoy them responsibly! The good news is they are protein and packed and naturally low in carbs. We are not going to fret over the calories here, but it's helpful to know they offer a solid protein hit, making them a satisfying nibble.

Recipe FAQs
Blimey, why are my hard boiled eggs such a faff to peel?
It’s often down to using eggs that are too fresh, which cling tightly to the shell; aim for eggs that are about a week old. Crucially, ensure you shock them immediately in an ice bath after cooking, as the sudden temperature change helps the membrane release from the shell, making peeling a doddle.
Can I make these lovely Deviled Eggs the day before the party?
Yes, absolutely! Store the cooked egg white halves and the finished yolk filling separately, covered tightly, in the fridge for up to two days. Assemble and garnish just before serving, which keeps the egg whites looking fresh and prevents them from drying out.
My filling always seems a bit lumpy. How do I get that perfectly smooth, posh texture?
The secret is to pass the cooked, mashed yolks through a fine mesh sieve using a rubber spatula before you mix in the wet ingredients; it’s a tiny bit of extra effort, but it ensures your filling is truly light, velvety, and spot on.
I’m not keen on mayonnaise what can I use instead for the filling?
Don’t fret, chap! For a lighter, tangier filling, you can substitute all or half of the mayonnaise with full fat Greek yogurt, créme fraîche, or even a dollop of smooth, whipped cottage cheese for a protein boost.
How long can these picnic classics safely sit out on the buffet table?
Due to the dairy and egg content, food safety guidelines dictate that deviled eggs should not be left at room temperature for longer than two hours. If it's a particularly warm day, aim for just one hour, or keep them nestled on a tray of ice to extend their buffet life.
Creamy Deviled Eggs Recipe
Ingredients:
Instructions:
Nutrition Facts:
| Calories | 165 calories |
|---|---|
| Fat | 13 g |
| Fiber | 0 g |
