Churned Ice Cream Delight: Chocolate & Vanilla Swirl
- Scoop into Sweet Nostalgia: Churned Ice Cream Delight: Chocolate & Vanilla
- Essential Ingredients Guide for Ice Cream Lovers
- The Magic of Creating Your Own Churned Ice Cream Delight: Chocolate & Vanilla Swirl
- Pro Tips & Secrets: Mastering Churned Ice Cream Delight
- Perfect Presentation: Serve Like a Pro
- Storage & Make-Ahead: Planning is Power
- Creative Variations: Shake It Up!
- Complete Nutrition Guide: What’s in Your Scoop?
- Expert FAQ Solutions: Your Burning Questions Answered
- 📝 Recipe Card
Scoop into Sweet Nostalgia: Churned Ice Cream Delight: Chocolate & Vanilla
Oh my gosh! let me take you back to those hot summer days from my childhood when i’d race down to the local ice cream shop with my friends.
The thrill of seeing all those flavors was basically like stepping into willy wonka’s chocolate factory! but you know what? nothing truly beats homemade ice cream.
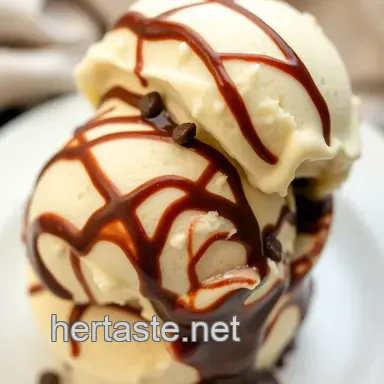
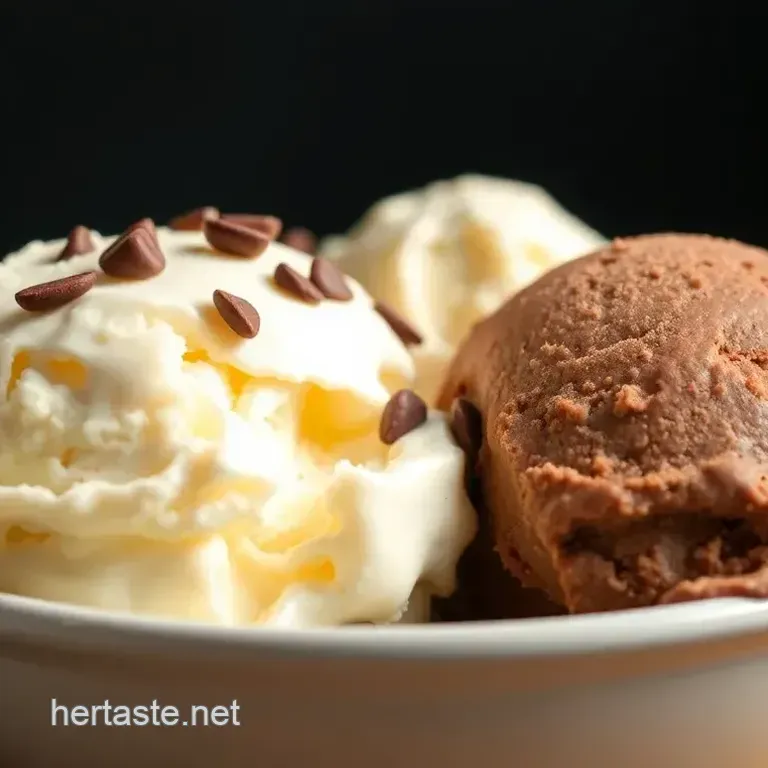
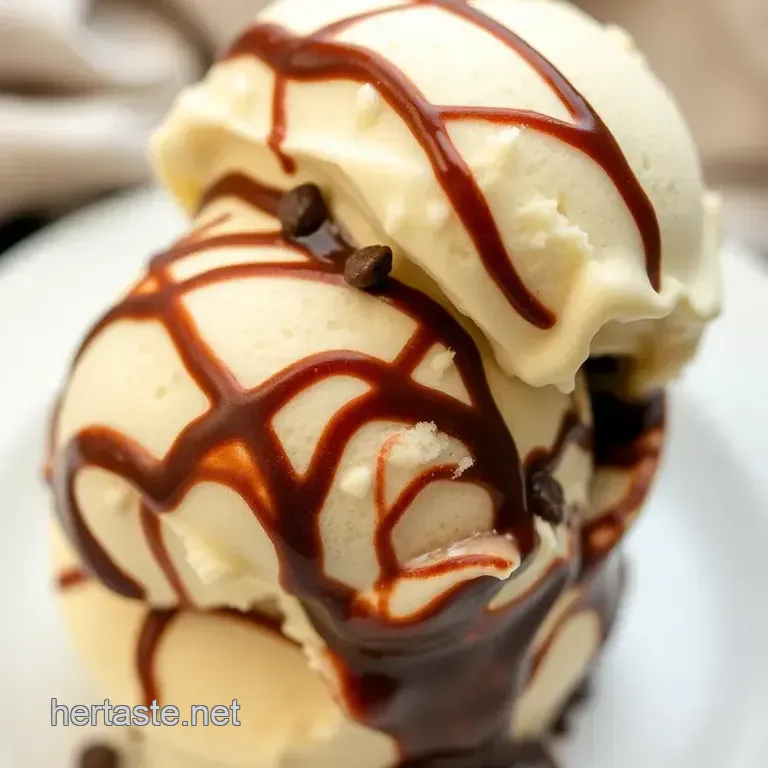
Churned ice cream delight: chocolate & vanilla is basically heaven in a bowl. imagine creamy chocolate and classic vanilla ice cream swirled together it’s like reliving those carefree days with every delicious bite.
It’s the kind of dessert that gives you warm fuzzies and reminds you of summer fun and family bbqs!
Let’s dive into the delight of crafting this easy ice cream recipe that’s perfect for any occasion.
Recipe Overview: A Taste of Tradition
The origins of churned ice cream date way back to the 18th century, drawing inspiration from italian gelato. when gelato started taking america by storm, homemade versions became a summer staple, especially with the advent of electric ice cream makers.
Today, it’s more than just a treat; it’s a way to create memories with loved ones.
This chocolate ice cream recipe and vanilla ice cream recipe meld perfectly together, making it a modern day classic. the prep is pretty straightforward, though i won’t lie it does take some time with about 20 minutes of active prep , and then there’s chilling.
Overall, you’re looking at about 2 hours from start to finish , but trust me, that wait is totally worth it.
Plus, it yields around 4-6 servings , making it great for sharing (if you’re feeling generous!).
Now, let's talk dollars and cents. you can whip up this treat without breaking the bank, especially considering you’ll get that artisan ice cream flavor right at home.
Ingredients like heavy cream, whole milk, and sugar won’t cost you an arm and a leg, and you can customize based on what you’ve already got!
Sweet Benefits: Why You’ll Love It
First off, let’s discuss the health perks of diy. while we all know frozen treats can be indulgent, making your own allows you to control the ingredients hello, no-store-bought ice cream mysteries!
homemade ice cream can be tailored to fit your diet, whether you want a rich custard base ice cream or prefer a lighter version with dairy-free alternatives.
You can even sneak in some flavors or mix-ins that are unique to your palate!
You know those summer gatherings where you want to serve something special? This creamy, dreamy delight is your go-to. It’s perfect for birthdays, BBQs, or just because it’s Wednesday and you need an excuse to treat yourself am I right?
Comparing this classic treat with store-bought options is a no-brainer. when you make your own churned ice cream, you’re not just creating a dessert; you’re crafting experiences.
Plus, nothing beats the joy of watching loved ones scoop out their own chocolate vanilla swirl and ice cream variations !
Now that you’re likely dreaming of a bowl of this creamy goodness, let’s get to the fun part gathering those ice cream ingredients ! Here’s what you’ll need…
Essential Ingredients Guide for Ice Cream Lovers
Oh my gosh, if you’re diving into the world of homemade ice cream , you’re in for a real treat! when i first dipped my spoon into this creamy, dreamy realm, i was blown away by how simple it is to whip up delightful flavors right in my own kitchen.
But hold up! before you grab your ice cream maker, let’s talk about the essential ingredients and tools you’ll need to nail that churned ice cream delight: chocolate & vanilla .
Premium Core Components
First things first, you gotta know what you’re working with. Here’s a rundown of your essential ice cream ingredients measured out for you in both US and metric :
For the Vanilla Base:
- 2 cups (480 mL) heavy cream
- 1 cup (240 mL) whole milk
- ¾ cup (150 grams) granulated sugar
- 1 tablespoon pure vanilla extract
- 4 large egg yolks
For the Chocolate Base:
- 1 cup (240 mL) heavy cream
- 1 cup (240 mL) whole milk
- ¾ cup (150 grams) granulated sugar
- ½ cup (50 grams) unsweetened cocoa powder
- 4 large egg yolks
- 1 teaspoon pure vanilla extract
Now, when shopping, look for quality indicators like organic milk or cream, real vanilla extract (not imitation), and fresh eggs.
Trust me, good ingredients make the difference between okay ice cream and wow! ice cream.
Signature Seasoning Blend
You might think of ice cream as simple, but it’s all about those flavor enhancers ! in our churned ice cream delight , we’re sticking to a classic combination of rich chocolate and creamy vanilla.
Feel free to play it up with other herbs and spices think lavender or mint if you're feeling adventurous.
And of course, regional variations come into play. add a little cinnamon to your chocolate for that mexican hot chocolate flair or throw in some crushed cookies to get that cookies and cream vibe going.
Smart Substitutions
Not everyone may have all the ingredients on hand, and that’s totally okay! Here are some smart substitutions you can use:
- If you’re out of heavy cream, go for half and-half it's not as rich, but it’ll still work!
- Got some lactose intolerance? No worries! dairy-free ice cream alternatives like almond milk can do the trick; it might just need extra sweetener since it’s not as creamy.
- Oh no, you have no eggs? Just mix in a bit of cornstarch dissolved in milk for a custard like base.
Sometimes you just gotta get creative when the ice cream cravings hit!
Kitchen Equipment Essentials
Alright, let's talk about the tools. you’ll need a good ice cream maker to really make that creamy, churned goodness happen.
I mean, it’s a must have for anyone serious about making artisan ice cream . if you don’t have one, a regular mixer can work in a pinch, but you might have to churn longer.
Here are some other must have tools :
- Medium saucepan
- Whisk
- Mixing bowls
- Fine mesh strainer this is key for that silky texture.
- Rubber spatula for mixing things in.
And remember, store your ice cream in a freezer safe container to lock in that freshness. No one wants icy crystals ruining their creamy frozen dessert vibes!
Wrapping It All Up
Before you dive into making your churned ice cream delight: chocolate & vanilla , make sure you’ve gathered all the ingredients and tools.
Follow the storage guidelines we've chatted about and use those freshness tips to keep everything in top-notch shape.
With all this info at your fingertips, you’re ready to take on the task of whipping up the most delicious ice cream variations imaginable.
Grab your ice cream maker and let’s get to the fun part because nothing beats the joy of homemade ice cream on a sunny day!
You got this, friend! Now, let’s get into those instructions to make this dreamy churned ice cream a reality.
The Magic of Creating Your Own Churned Ice Cream Delight: Chocolate & Vanilla Swirl
Oh, summer! it’s that time of year when ice cream dreams come true. and if you're anything like me, nothing beats homemade ice cream, especially when it’s a fabulous churned ice cream delight: chocolate & vanilla masterpiece.
Making ice cream from scratch may seem a bit daunting, but trust me, it’s a breeze with the right professional cooking methods.
Let’s dive into all the delectable details!
Essential Preparation Steps
Before we even think about turning on that ice cream maker, we need to get prepped. first up is mise en place .
This fancy french term just means getting all your ingredients ready. measure out 2 cups of heavy cream and 1 cup of whole milk for the vanilla base.
And don’t forget that ¾ cup of sugar ! you'll want it all handy; trust me, not scrambling for ingredients mid-cooking is key.
Next, let’s talk time management . this recipe usually takes about 2 hours total, including prep and chill time, so plan accordingly.
While your custard is cooling, you could binge watch your favorite show, right? or maybe you’re more of a gardening type no judgment here!
Then, there’s organization . keep different bowls for the vanilla and chocolate mixtures, and label them if needed. it makes everything feel slick and smooth like your future ice cream.
Speaking of smooth, don’t forget those safety considerations. always watch your stove and keep an eye on those temperatures don’t go wandering off!
step-by-step Process
Alright, let’s run through the step-by-step process! Here’s how it goes down:
Make the Vanilla Base:
- Combine 2 cups of heavy cream , 1 cup of whole milk , and ¾ cup of sugar in a medium saucepan over medium heat. Stir until sugar dissolves.
- Whisk 4 large egg yolks in a bowl, then temper them by adding a bit of the hot cream mixture.
- Pour the yolk mix back into the saucepan. Cook until it thickens enough to coat the back of a spoon, about 5- 7 minutes .
- Strain it, add 1 tablespoon of pure vanilla extract , and chill.
Create the Chocolate Base:
- Do the same with 1 cup heavy cream , 1 cup whole milk , ¾ cup sugar , and ½ cup cocoa powder .
- Once it’s smooth and thickened (another 5- 7 minutes ), mix in those egg yolks and strain. Toss in 1 teaspoon of vanilla too!
Churn Away:
- Follow your ice cream maker’s instructions. Generally, it takes about 30 minutes to churn each flavor until creamy.
Layer the Goodness:
- Now here’s where the art comes in: alternate scoops of vanilla and chocolate in a freezer safe container. Don't forget to swirl!
The Freezing Finale:
- Freeze it for at least 2 hours to firm up.
Expert Techniques
Now here comes the good stuff. Mastering this churned ice cream truly is an art. Here are several expert techniques to assure victory:
- When making your custards, keep the heat gentle. Too hot, and you’ll end up with scrambled eggs in your creamy creation.
- Always strain your bases to catch any clumps and ensure that velvety texture . Nobody wants a lumpy scoop!
Success Strategies
Avoiding mistakes in ice cream making is essential. Here are a few success strategies :
- Watch those temps: The vanilla base should be around 170° F- 175° F when thickening.
- Make sure everything is COLD before churning. If your base isn’t sufficiently chilled, your ice cream will be icy and less creamy. Patience pays!
Now, if you’re wanting to prep this ahead of time, you can store each base in the fridge for up to 24 hours . Just remember the fresher, the better.
To Wrap it Up
Crafting homemade ice cream is more than just following a recipe; it’s about embracing the process. you'll have a creamy frozen dessert that’s bursting with flavor, perfect for any occasion.
And honestly, who doesn’t want to impress their friends with their very own artisan ice cream ? so next time you’re hit with a hot summer day, whip up your very own churned ice cream delight: chocolate & vanilla and bask in the glory of your culinary creativity!
Additional Information
Stay tuned for more awesome recipes and tips for your homemade dessert adventures!
Pro Tips & Secrets: Mastering Churned Ice Cream Delight
Alright, let’s dive in! when it comes to making churned ice cream delight: chocolate & vanilla , you want to make sure you’re having fun while keeping things smooth and creamy.
Here are a few pro tips straight from my kitchen:
Use fresh ingredients: Seriously, fresh eggs and real vanilla make a huge difference. You’ll taste that depth in your homemade ice cream that store-bought just can’t match!
Chill time is key: before you even start churning, cool that custard base ! leaving it overnight in the fridge will enhance the flavors so much.
I kid you not; it’s totally worth it!
Don’t rush the churning: It's tempting to think, "It looks thick enough!" but over churning can lead to icy textures. Aim for just the right amount of thickness like soft serve ice cream!
Flavor booster: To really amp up that chocolate flavor, toss in a pinch of sea salt. It’s a game changer! Your chocolate base will taste even richer.
Serving pro-tips: Warm your bowls slightly before scooping. This will help the ice cream glide out easier, making for a perfect scoop!
Perfect Presentation: Serve Like a Pro
Now let’s talk about making that Churned Ice Cream Delight look as good as it tastes! Presentation is everything, especially when you’re hosting guests.
Plating techniques: Use a warm scoop to get those perfect round balls. Seriously, a little warming goes a long way!
Garnish ideas: drizzle some chocolate or caramel sauce over the top. add chocolate shavings or crushed nuts for that crunch factor.
You can even sprinkle a few berries for a pop of color!
Color combinations: The rich brown of chocolate alongside the creamy white of vanilla is already a gorgeous visual. But you could also add vibrant fruits or a sprig of mint for that extra oomph!
Visual appeal tips: Create a layered look in your bowls. Start with chocolate on the bottom, then vanilla, and top with your fancy garnishes. It’s like a work of art!
Storage & make-ahead: Planning is Power
Making Churned Ice Cream is a fun weekend project, but what if you're craving it on a Tuesday? Here’s how to store it properly:
Storage guidelines: Keep the ice cream in an airtight container to prevent those annoying ice crystals from forming. No one wants a weird texture ruining their treat!
Freshness duration: It’s best enjoyed within one to two weeks, but if you’re like me and have a sweet tooth, that won’t be hard!
Reheating instructions: For a softer scoop, leave it on the counter for about 5- 10 minutes before serving. You’ll be thanking me later for this tip!
Creative Variations: Shake It Up!
If you’re feeling adventurous, let’s try some different spins on your Churned Ice Cream Delight . Why stick to the classic chocolate and vanilla?
Flavor adaptations: How about a Mint Chocolate Chip version? Just add peppermint extract to the vanilla base and toss in some chocolate chips. Refreshing, right?
Seasonal twists: Try adding pumpkin spice in the fall or fresh strawberries in summer. It’s like a seasonal ice cream party in your mouth!
Dietary modifications: Make it dairy-free by using coconut milk or almond milk who says you can’t have delicious ice cream while being mindful of your diet?
Complete Nutrition Guide: What’s in Your Scoop?
Let’s not ignore the nutritional side, shall we? Here’s the lowdown if you’re curious about what you’re indulging in:
Calories: About 350 per serving, but honestly, it’s worth every bite when you think about that creamy goodness!
Health benefits: Think of it this way homemade ice cream can have less sugar than store-bought versions. Plus, you control the ingredients. That’s a win!
Portion guidance: Serving sizes are about 1 cup, perfect for satisfying those sweet cravings without going overboard.
Expert FAQ Solutions: Your Burning Questions Answered
We’ve all been there with a few questions lurking in our minds. Here are some answers to common queries about your Churned Ice Cream journey:
What if my ice cream isn’t creamy? You may have over churned it. Don’t stress, just keep an eye on the texture next time.
Can I skip the egg yolks? Technically, yes. But they add a rich flavor and creamy texture. Think twice before omitting!
Can I use low-fat milk? Absolutely! Just remember it’ll change the creamy texture to more of a frosty treat.
In the end, making churned ice cream delight: chocolate & vanilla is about enjoying the process. it’s a delightful way to bring some happiness into your kitchen (and those around you!).
So roll up your sleeves, bring out that ice cream maker, and get churning! you got this!
Churned Ice Cream Delight Chocolate Vanilla