Rustic Artisan Italian Bread: a Taste of Tradition
- Embrace the Artisan Italian Bread Craze
- Crafting a Slice of History
- Benefits Beyond the Baguette
- Essential Ingredients Guide for Artisan Italian Bread
- Mastering the Art of Cooking: The Professional Method
- Pro Tips & Secrets to Italian Bread Making
- Perfect Presentation: Let’s Make it Gorgeous!
- Storage & Make-Ahead: Keep Your Bread Fresh
- Creative Variations: Spice it Up!
- Complete Nutrition Guide: Stay Informed
- A Final Note to Fellow Home Bakers
- Frequently Asked Questions
- 📝 Recipe Card
Embrace the Artisan Italian Bread Craze
Have you ever caught the whiff of fresh bread baking and felt an uncontrollable urge to dive right in? oh man, i can relate! just the other day, i was attempting some artisan italian bread and boy, let me tell you, it turned my kitchen into a mini italian bakery.
Picture me, standing there with flour dust on my nose, totally in my element! it’s like i was channeling my inner nonna, right? and before i knew it, that golden crust was calling my name.
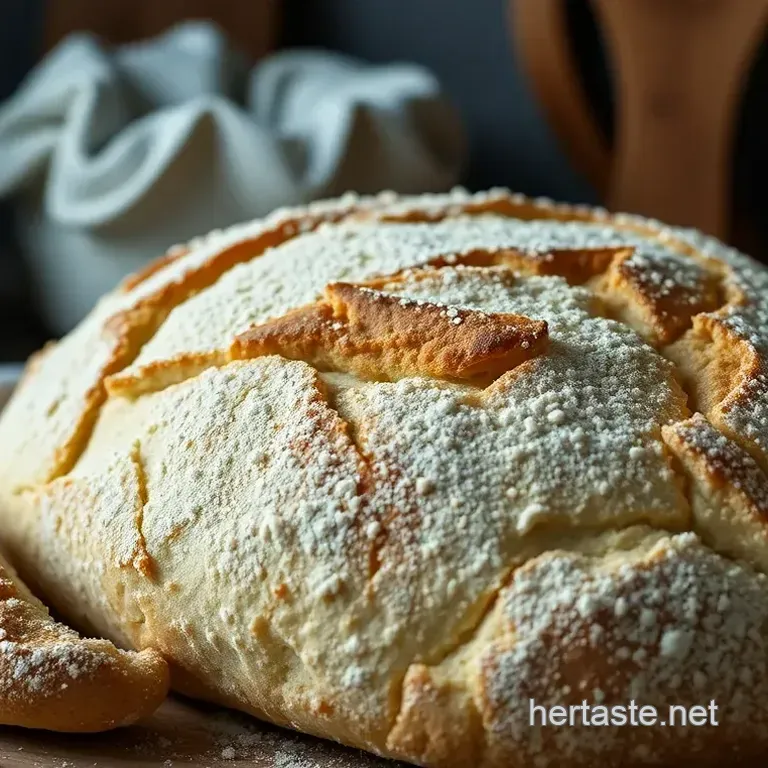
Artisan bread has this magical ability to connect us to tradition while making our homes smell absolutely divine. it’s not just any bread; it’s rustic , it’s inviting , and it’s loaded with flavor.
This isn’t your average loaf it’s a celebration of simple ingredients crafted into something extraordinary.
Crafting a Slice of History
Did you know that the roots of traditional italian bread stretch back centuries? originally, it began in little villages all across italy.
Back then, bakers relied on basic ingredients just like in this rustic bread recipe. fast forward to today, and artisan bread has become a staple in kitchens across the globe.
Honestly, there’s something magical about making this homemade artisan bread, especially when you realize you're following in the footsteps of thousands of bakers before you.
Now, here’s the scoop: this recipe, while approachable, does take a little time. you’ll need about three hours total, including some quality rise time, but don’t sweat it! the effort is absolutely worth it.
Plus, you’ll whip up one large loaf that serves around 12 people (or one very hungry maybe not-so-ashamed person).
As for costs, you may be surprised! most of the artisan bread ingredients like flour, water, salt, and yeast won’t break the bank.
Oh, did i mention you probably already have most of it in your pantry? so, less shopping means more baking!
Benefits Beyond the Baguette
Now let’s talk about why you should bother baking this bread yourself. first off, let’s get real: there are health benefits to whipping up your own bread.
No preservatives, no funky additives just pure, wholesome goodness. it’s a great way to control what goes into your food and if you’re mindful about the flour you choose, you can cater to special diets or even make delicious healthy bread alternatives .
Also, have you thought about the occasions for which you can serve this bread? think family dinners, holiday feasts, or backyard bbqs.
A good loaf of rustic crust italian bread is instantly classy and elevates any meal.
But here's where it gets even better: baking this bread at home gives you the freedom to play around with flavors.
Want to add some garlic? toss in fresh herbs? the world is your oyster! just remember, while sourdough vs. artisan bread might spark some debates, the joy of creating your own masterpiece is what it’s all about!
Now, as we’re about to dive into the nitty gritty of the ingredients trust me, you’ll want to have your measuring cups at the ready! because once you get a taste of that crusty bread at home, there’s no turning back.
So grab your apron, and let’s start this delicious journey together!
Essential Ingredients Guide for Artisan Italian Bread
Baking your own artisan italian bread at home can be a super rewarding experience. there's just something special about pulling a hot loaf out of the oven, right? but let’s not get ahead of ourselves.
First, we need to talk about the essential ingredients that make this bread sing!
Premium Core Components
When it comes to artisan bread ingredients , quality is key. You can’t just throw any flour into the mix. Here’s a rundown of what you need:
Flour: for this rustic bread recipe, you’ll want about 4 cups (480g) of all-purpose or bread flour . try using a high protein flour for that perfect crusty texture.
Looking for long fermentation bread? opt for a bread flour and watch the magic happen!
Water: Use 1 ½ cups (360ml) of warm water , ideally around 110° F ( 43° C) . Don’t just guess use a thermometer!
Activating the yeast properly will make all the difference.
Yeast: Grab 2 teaspoons (7g) of active dry yeast . If you’re in a pinch, instant yeast can replace it in the same amount.
Salt: Don’t skimp on the flavor! Add in 2 teaspoons (10g) of sea salt . This is not just a seasoning; it’s essential for texture and taste.
Storage guidelines: keep your flour in a cool, dry place. unopened, it can last about a year. once opened, use it within 6 months for the best flavor.
Yeast? store it in the fridge for longevity.
Freshness tips: Always read the expiration date and give your ingredients a little smell test. If it smells funky, toss it out!
Signature Seasoning Blend
Now, about enhancing flavors spices can elevate your bread from good to WOW!
Essential spice combinations: think about adding a pinch of garlic powder or dried herbs like oregano. trust me, with a rustic crust italian bread, flavors like these will make your taste buds dance.
Herb Selections: Pair classic Italian herbs like basil and rosemary for a fragrant twist. These aren’t just for show, folks they enhance the overall experience!
Smart Substitutions
Let’s face it sometimes, you just don’t have all the ingredients on hand. No worries, we’ve got some clever substitutions .
Common alternatives: If you run out of sea salt, kosher salt works just as well! Need a gluten-free version? Consider a 1:1 gluten-free baking blend .
Emergency replacements: You can swap a bit of the water with stock for a richer flavor or add in cooking oil if you're looking to change up the texture.
Seasonal options: In summer, how about throwing in some zucchini or sun-dried tomatoes? They can make a flavorful addition to your dough.
Kitchen Equipment Essentials
Before you roll up your sleeves to dive into the world of Italian bread making , let’s not forget about the tools!
Must have tools: A large mixing bowl, a wooden spoon, and a baking stone or Dutch oven are must haves.
Preparation tips: A kitchen scale helps ensure accurate measurements. Results are way better when everything's precise!
Storage solutions: Keep your baking tools organized. A tidy kitchen makes baking way more enjoyable, don’t you think?
Honestly, the little details matter when you’re trying to achieve that perfect crusty bread at home.
So, now that you’ve got the low-down on all these essentials, let’s get to the fun part putting it all together to create homemade artisan bread ! You don't want to miss that magical moment when the dough transforms into a beautiful loaf, right?
Stay tuned for the step-by-step instructions. I promise, once you master these techniques, you’ll be serving up slices of fresh, crusty goodness that would make any Italian nonna proud!
Mastering the Art of Cooking: The Professional Method
If you've ever watched a cooking show and wondered how those pros whip up a dish in mere minutes, welcome to the club! it's all about having a game plan.
That’s where the professional cooking method shines through. let's walk through the essential steps and techniques that’ll make you feel like a culinary aficionado, even if you’re just tackling some artisan italian bread .
Essential Preparation Steps
First things first mise en place . it sounds fancy, right? but it just means having all your ingredients prepped and ready to go.
Imagine trying to bake bread without measuring your flour or activating your yeast (spoiler: it’s a big mess). so, gather your artisan bread ingredients beforehand.
Then there's the whole time management shindig. every great meal requires a good clock watcher! set timers to help you juggle multiple tasks.
For instance, you’ll want to keep an eye on that initial rise for about 1 hour .
And let’s not forget organization . Keep your workspace tidy. Use bowls for your chopped herbs or spices. Trust me, it’ll save you time and sanity later!
Lastly, safety first! Always use proper kitchen tools and handle hot items with care. Keep a damp cloth nearby to clean up any spills. No one likes slipping on flour, right?
Step-by-step Process
Oh, you want clear, numbered steps? You got it! Here’s how to make your artisan bread like a pro:
Activate your yeast : combine 1 ½ cups of warm water (about 110° f) with 2 teaspoons of active dry yeast .
Let it sit for 5- 10 minutes until it's frothy.
Make the dough : mix 4 cups of all-purpose flour with 2 teaspoons of sea salt in a bowl. pour in that frothy yeast mixture.
Stir until it looks like a shaggy mess.
Knead if desired : Optional, but kneading for 8- 10 minutes can develop that gluten texture.
Initial rise : Place the dough in an oiled bowl, cover with a damp towel, and let it sit for 1 hour until it's doubled.
Shape the dough : Gently press it down and form a round loaf on a floured surface.
Second rise time : Cover the loaf again and let it rise for another 30- 45 minutes .
Preheat your oven to 450° F ( 230° C) , about 30 minutes before baking.
Score the bread : Make a few slashes on top to help it expand.
Bake : Pop it in the oven for 30 minutes until it’s golden brown.
Cool down : Let it sit on a wire rack before slicing!
Expert Techniques
Now, let’s get into some neat tricks from the professional world. One key tip is temperature control . Keeping that dough at the right dough rising temperature helps it develop flavor.
Also, be vigilant about timing. that first rise is where the magic really happens! give it the time it needs; don't rush it! if you’re patient, your bread will have that fantastic rustic texture we all crave.
Recognize the quality checkpoints too. before baking, check for a slightly puffy look and a pleasant smell. if it doesn't smell right, don’t bake it! and if things aren’t going your way? troubleshooting is key.
Was your yeast activation method off? check it again next time.
Success Strategies
We’ve all been there, making common mistakes in the kitchen. One biggie? Overworking the dough can lead to tough bread. Stick to the knead time and don’t get carried away!
To up your quality assurance , always taste your ingredients. fresh herbs will elevate your artisan bread from "meh" to "wow.
" for me, using fresh basil or garlic gave my bread that italian flair!
And if you need to prep ahead? fear not! you can make the dough a day in advance and let it rise slowly in the fridge.
Just remember to pull it out a bit before shaping.
Making rustic crust italian bread isn’t just about the end result; it’s about enjoying the journey. so don’t stress too much if things aren’t perfect right away.
With practice, you’ll be pulling out crusty, warm loaves of homemade artisan bread that will make you feel like a baking master.
Now that you’re armed with this knowledge, get excited! next up is a deep dive into some additional information to help you on your baking journey.
Let's keep making magic in the kitchen together!
Pro Tips & Secrets to Italian Bread Making
Oh my gosh, if you’re diving into the world of artisan italian bread , let me share some secrets. you know, those little nuggets of knowledge that your fave chefs might not spill? here are my go-to tips for traditional italian bread making, straight from my kitchen to yours.
First things first, time saving techniques can play a huge role. instead of kneading that dough for ages, give the autolyse method a shot.
Just mix your flour and water, let it sit for about 30 minutes, and then add your yeast and salt.
This not only cuts down on elbow grease but ramped up flavor too!
For flavor enhancement , don’t skip on good quality flour! using high protein bread flour will seriously make a difference in that rustic crust you’re after.
Also, consider a longer fermentation process. allowing the dough to rise slowly in the fridge overnight? yes, please! it boosts flavor and gets those magical bubbles in the bread texture.
Trust me, your taste buds will thank you.
Now, when it comes to presentation advice , a simple trick can elevate your rustic loaf. think scoring the surface right before it goes into the oven.
It not only allows steam to escape but also gives that gorgeous, artisan look everyone loves.
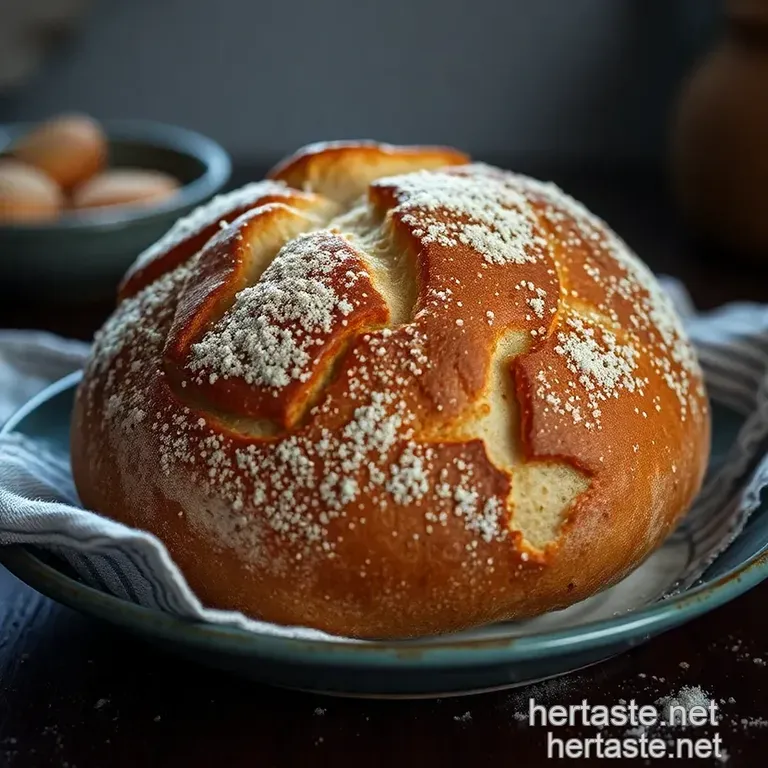
Perfect Presentation: Let’s Make it Gorgeous!
Speaking of looks, let’s chat about how to plate that beautiful loaf. this isn’t just any bread; it's an artisan masterpiece .
When it’s cooled off (because, seriously, we don’t want burnt fingers!), place it on a wooden board for that farm-to-table feel .
Garnish is key too! a sprinkle of fresh herbs or a drizzle of olive oil on the side can really highlight that lovely, rustic bread.
And don’t forget about color serve it alongside vibrant dips like pesto or sun-dried tomato spread for a feast that’s a feast for the eyes .
Storage & make-ahead: Keep Your Bread Fresh
Let’s talk storage . i know we want to savor every slice of that luscious bread, am i right? make sure you wrap it in a clean kitchen towel and keep it at room temperature.
That way, it stays crusty on the outside while remaining soft inside.
If you’re prepping in advance, consider making the dough and freezing it after the first rise. just shape it after thawing, let it proof, and bake! you’ll have fresh bread on the table without the last minute stress.
When reheating, pop it right back in the oven for a few minutes. You want to bring back that crusty perfection we all love.
Creative Variations: Spice it Up!
Now that you’ve mastered the italian loaf recipe , let’s flirt with some variations! feeling adventurous? toss in some dried herbs or even some olives .
They’ll add amazing flavors and make your bread stand out.
Transitioning to seasonal twists can also be fun! Think about incorporating pumpkin in the fall or maybe a nutty flavor for winter. The possibilities are endless with this homemade artisan bread !
And if you're dealing with any dietary restrictions, don't fret. Swap out the regular flour for a gluten-free blend , and you'll still enjoy that wonderful bread baking experience.
Complete Nutrition Guide: Stay Informed
Now, before i wrap this up, let’s touch on the nutrition part . artisan bread isn’t just a delicious treat; it has its perks too! it’s relatively low in calories and can offer a nice source of carbs.
With simple ingredients like flour and water, you’re getting that wholesome goodness without any of the junk.
However, keep portion sizes in mind. bread can be a little sneaky when it comes to calories, you know? enjoy your slice but try to balance it with healthy sides like veggies or lean proteins.
A Final Note to Fellow Home Bakers
Baking your own rustic crust italian bread is an adventure filled with frustrations and triumphs , but nothing beats that fresh baked smell wafting through your kitchen.
So, gather those ingredients, embrace the fermentation process, and don’t be scared of making a little mess. it’s all part of the process!
Most importantly, enjoy the journey. whether you nail that crust on the first try or it ends up looking like a flat pancake (hey, we've been there), just remember: bread making is an art, and every loaf tells a story.
Happy baking, friends!
Frequently Asked Questions
What makes artisan Italian bread different from regular bread?
Artisan Italian bread is typically characterized by its use of high-quality ingredients and traditional baking methods, which result in a unique flavor and texture. The focus is on natural fermentation, allowing the dough to rise slowly, producing a crusty exterior and a chewy, airy interior, which sets it apart from mass produced bread.
How can I achieve a crispy crust on my artisan Italian bread?
To get that signature crispy crust, you can create steam in your oven by placing a cast iron skillet filled with water on the bottom shelf while the bread bakes. Additionally, baking in a preheated Dutch oven traps moisture, producing a beautifully crusty loaf.
Scoring the top of the bread with a sharp knife also allows steam to escape and enhances crust formation.
How should I store my artisan Italian bread?
Store your artisan Italian bread in a paper bag at room temperature to keep the crust crisp. If you need to store it for a longer period, wrap it tightly in plastic wrap and place it in the freezer. Just be sure to allow it to come to room temperature before slicing for the best texture.
Can I customize my artisan Italian bread with ingredients like herbs or olives?
Absolutely! You can personalize your artisan Italian bread by adding ingredients such as dried herbs, olives, cheese, or even roasted garlic to the dough. Just be careful not to overload it with too many additions, as this can interfere with the dough's structure and rising ability.
What nutritional considerations should I keep in mind when making artisan Italian bread?
Artisan Italian bread is a great source of carbohydrates but has relatively low protein and fat content. If you're looking for a healthier option, consider substituting some all-purpose flour with whole wheat flour to increase fiber and nutrient content.
Additionally, always be mindful of portion sizes, especially if you are managing your caloric intake.
Is artisan Italian bread easy enough for beginners to make?
While the process of making artisan Italian bread requires some practice, it is definitely manageable for beginners. Start by following the step-by-step instructions closely and be patient with the rising times; this is where the flavor develops. With practice, you will gain confidence and achieve great results!
Rustic Artisan Italian Bread A Taste Of Traditio