Perfectly Toasted Homemade English Muffins
- Look into into Homemade English Muffins: A Breakfast Game-Changer
- Essential Ingredients Guide
- Mastering the Art of Homemade English Muffins
- Pro Tips & Secrets for Your Homemade English Muffins
- Perfect Presentation: Plating Your Muffins
- Storage & Make-Ahead: Muffin 101
- Creative Variations: Mix It Up!
- Complete Nutrition Guide: Know What You’re Eating
- Wrapping It Up!
- Frequently Asked Questions
- 📝 Recipe Card
Look into into Homemade English Muffins: A Breakfast Game Changer
Have you ever just craved that perfect bite in the morning? you know, the kind that’s warm, a little crispy, and downright delicious? well, let me tell you a little story.
One summer morning, i woke up with the sun pouring in and a random thought hit me: what if i could make homemade english muffins? i flipped through my recipe books, gathered my ingredients, and before i knew it, my kitchen was filled with the smell of warm, toasty goodness.
Turns out, making homemade english muffins is not only easy but also a game changer for breakfast. you just can’t beat that satisfaction of biting into a soft, fluffy muffin you made from scratch!
A Slice of History: The English Muffin
Now, let’s get a bit into the fun stuff! did you know that english muffins actually originated in england? they made their way to america in the late 1800s and quickly became a breakfast staple.
So, these are not just any muffins; they’re steeped in history! traditionally baked on a griddle, they have that wonderful crispy exterior paired with a soft and airy interior.
The beauty of these muffins is their versatility. they can be used for breakfast sandwiches, slathered in jam, or even topped with poached eggs for that fancy eggs benedict dream you didn’t know you needed.
And let’s be honest, who doesn’t love an easy homemade breakfast idea that you can whip up in under two hours?
Quick and Easy: What You Can Expect
Making homemade muffins doesn’t require you to be a kitchen pro. the whole process is a delightful medium level challenge, perfect for anyone who's tried baking at least once.
The trick is all in the details! you'll need about 15 minutes of active prep time , a bit more if you count the hour of rising time, and then about 20 minutes to cook .
The magic is in the rising dough, and trust me, that patience pays off! plus, you can make 8 beautiful muffins for around $3, which is way cheaper than store-bought versions.
Talk about a win-win!
Muffin Perks: Beyond Just Deliciousness
So, why should you dive into making these homemade english muffins? for starters, the health benefits are pretty cool! these muffins are low in sugar, and you can swap in whole wheat flour if you’re looking for a healthier twist.
If you’re like me, you love that feeling of knowing exactly what goes into your food. you can also customize them with fillings like cheese or herbs for a different flavor kick.
And let’s not forget about the occasions! whether it’s a lazy sunday brunch or a busy weekday, these muffins fit the bill.
They’re also perfect for those last minute guests or serving for holiday breakfasts. plus, they’ve got this unique crunchy texture that you just won't find in store-bought varieties.
You can even try different english muffin variations just to keep things interesting ketchup, sriracha, or even avocado, the sky's the limit!
From Dough to Delight: Your Next Steps
If you're totally on board with this, let's take a moment to gather those ingredients and tools! we’ll dive into that delicious dough making process that’ll have your kitchen smelling heavenly.
Get your mixing bowl, flour, yeast, and some warm milk ready; trust me, you’re going to want to make these! before you know it, you’ll be on your way to perfecting your own batch of homemade english muffins ready for toasting, slathering, and, of course, sharing with friends (or keeping them all to yourself, no judgment here!).
Ready to roll up those sleeves? Let’s get cooking!
Essential Ingredients Guide
Let’s chat about making the perfect homemade english muffins . there’s nothing quite like pulling those golden, toasted beauties from the griddle, right? but before we dive into the mouthwatering details, let’s go over some essential ingredients you need to nail this whole process.
Premium Core Components
When you're gathering your ingredients, measuring correctly is key! Here's a quick rundown:
Flour: You’ll need 4 cups (480 g) of all-purpose flour . Look for something with a good protein content. That helps create those chewy, yet soft and fluffy muffins we all crave.
Yeast: grab 1 ½ teaspoons active dry yeast (7 g) . make sure it’s fresh! if your yeast isn't bubbling in that warm milk, it's time for a fresh pack.
Trust me, i learned that the hard way!
Sugar & Salt: Just 1 tablespoon (12 g) of sugar and 1 teaspoon (6 g) of salt will do. These two enhance the flavor and manage fermentation, respectively.
Butter & milk: use 2 tablespoons (28 g) melted unsalted butter and 1 ½ cups (360 ml) warm milk ( 110° f / 43° c) .
Your milk should feel just warm to the touch, not scalding.
For storage , keep your flour in a cool, dry place for up to six months. And don’t forget: always check that yeast expiration date; nobody wants flat muffins!
Signature Seasoning Blend
Now, let’s talk about how to kick those homemade muffins up a notch! The magic is in layering flavors!
Consider adding herbs like oregano or thyme into your dough. Just a teaspoon can totally change your game and makes your kitchen smell amazing!
If you’re feeling adventurous, throw in some garlic powder or Italian seasoning. Yum!
Don’t forget that good ol’ butter on top after toasting it’s like a warm hug for your taste buds.
Smart Substitutions
Oh no, out of one of your key ingredients? Don’t panic, I got you!
Flour: If you’re healthy minded, try half all-purpose and half whole wheat for a heartier muffin.
Milk: Almond milk or oat milk work perfectly well if you want a dairy-free option.
Butter: Olive oil can be a lighter alternative.
These little tricks will keep your homemade muffins nutritious and scrumptious without missing a beat.
Kitchen Equipment Essentials
Don't forget your tools! Here’s what you’ll need for this journey:
Mixing Bowl: A large one for all those components. Trust me, you don’t want a mess.
Whisk & Spatula: For mixing your ingredients; a spatula helps scrape every last bit into your bowl!
Griddle or Skillet: A cast iron skillet gives those muffins a nice crust. Just don’t crank the heat!
Baking Sheet: For the second rise, a simple baking sheet lined with parchment paper will do the trick.
Cornmeal: This isn’t just decoration; it prevents sticking while adding that classic English muffin texture.
Wrap-Up
Now that you’re armed with the foundational ingredients, substitutions, and must have equipment, you’re ready to step into the world of muffin making !
Stay tuned for the step-by-step instructions on how to whip up those perfectly toasted homemade english muffins . you’re just a few minutes away from a breakfast game changer, whether it’s a classic english muffin sandwich or a simple jam spread.
Get ready to impress yourself and anyone lucky enough to share with you!
Mastering the Art of Homemade English Muffins
Let’s talk about the joy of creating homemade english muffins . seriously, there’s something so satisfying about pulling fresh, warm muffins out of the pan.
They have that perfect crispy exterior and a soft, fluffy inside, making them ideal for toasting and spreading with butter or your favorite jam.
If you've ever thought, "gosh, i could never make those," stop right there! with some patience and attention, you’ll become a muffin master.
Essential Preparation Steps
First things first, let’s get organized before we dive into this muffin making adventure. this step is called mise en place a fancy way of saying “everything in its place.
” gather all your ingredients and tools. you'll need all-purpose flour, active dry yeast, milk, sugar, salt, butter, a mixing bowl, and a skillet.
Also, cornmeal for dusting. it helps your muffins not stick.
Now, onto time management . total prep and cooking time for our muffins is about 1 hour and 35 minutes. yes, you’ll need to set aside time for the dough to rise (around 1 hour ) but it’s totally worth it! while the dough rests, you can kick back, enjoy a coffee, or prepare your favorite breakfast toppings.
Oh, safety is a biggie too! When you're working with hot pans and yeasted dough, be sure to keep your space tidy to avoid any mishaps.
Step-by-step Process
Activate the yeast : mix 1 ½ cups warm milk at 110° f with 1 tablespoon sugar and ⅓ tablespoon active dry yeast .
Let it sit for about 5- 10 minutes until it’s all bubbly.
Combine your dry goods : In a big bowl, whisk together 4 cups flour and 1 teaspoon salt .
Make the dough : Pour your yeast mixture and 2 tablespoons melted butter into the flour. Mix until you get a shaggy dough.
Knead it out : On a floured surface, knead your dough for 5- 7 minutes , until it’s smooth.
First rise : Place this beauty in a greased bowl, cover, and let it rise for about 1 hour —you want it doubled in size!
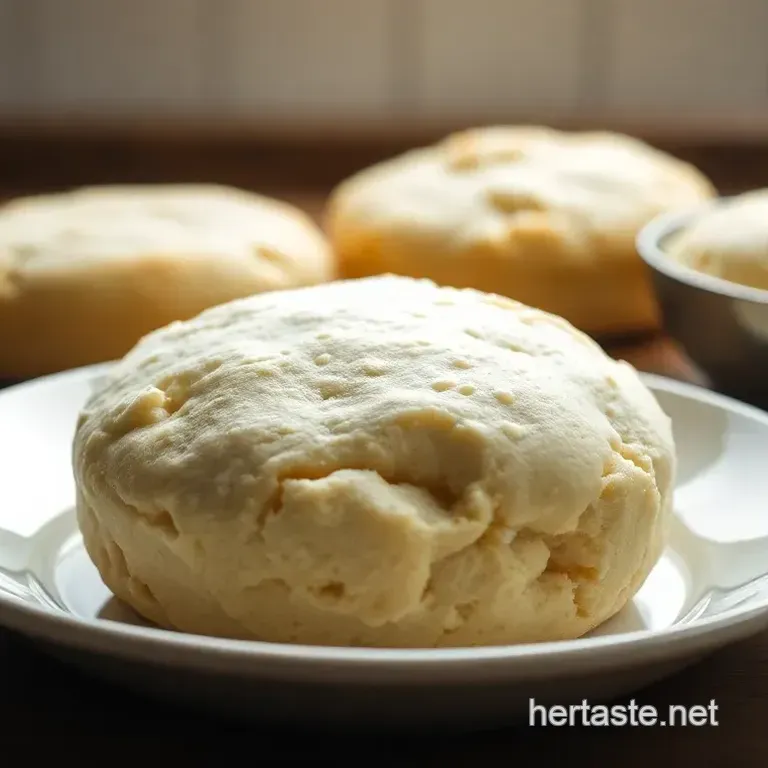
Shape the muffins : Punch down that dough and roll it out 1 inch thick . Cut rounds with a biscuit cutter and dust with cornmeal.
Second rise : Let the shaped muffins rise for another 30 minutes .
Cook them up : heat up a skillet on low-to-medium. cook those muffins 7- 10 minutes on each side until golden brown.
Keep an eye on the temperature to avoid burning!
Cool and serve : Once done, let 'em cool, and then split with a fork for that signature English muffin texture.
Expert Techniques
Alright, here’s where it gets good. A few critical steps can make or break your muffins.
Perfect temperature : Keeping your cooking temperature low is key! If it’s too high, you’ll have burnt muffins on the outside and raw in the middle. Aim for that sweet spot.
Check your dough : Make sure it’s smooth but not overworked. Less kneading means softer muffins!
Quality checkpoints : Always trust your yeasty instincts! If your yeast doesn’t foam, toss it. No one wants flat muffins.
Success Strategies
Let’s avoid those common mistakes, shall we?
Over kneading is a big no-no. Stop kneading once the dough feels soft and pliable.
Bread rising tips : Keep the dough in a warm, draft free place. A slightly warmed oven works wonders!
When it comes to storage , remember to let them cool completely before stacking in an airtight container no one likes stale muffins!
And if you're prepping ahead, these muffins freeze beautifully. Just toast them up when you’re ready for a quick breakfast!
So, there you go! now you know how to make scrumptious, homemade english muffins from scratch! start experimenting with variations, like adding cheese or herbs, and you'll find yourself with endless options for breakfast muffin ideas.
Let your creativity flow, and don’t hold back on those delicious muffin toppings!
We'll jump into more additional information about muffins, including some fun variations and tricks, telling you exactly what to do next! Happy cooking, my muffin maven!
Pro Tips & Secrets for Your Homemade English Muffins
Okay, let’s dive into some pro tips and secrets that will make your homemade english muffins truly shine. first off, every chef has a few tricks up their sleeve.
My secret? foamy yeast is your best friend! always make sure your yeast is bubbly before you get started. if it's not, nope, not gonna work.
Time saving techniques? i hear ya! while you're waiting for the dough to rise, prep your kitchen by cleaning or gathering all your muffin making tools .
It’s like multitasking for the win! and if you're all about that flavor boost, try adding a pinch of garlic powder or dried herbs to your dough.
Trust me, it elevates your english muffin recipe beyond the ordinary.
When it comes to presentation, think of your muffin as an artist’s canvas. Dusting with cornmeal not only helps with texture but gives it that rustic look that screams “I’m homemade!”
Perfect Presentation: Plating Your Muffins
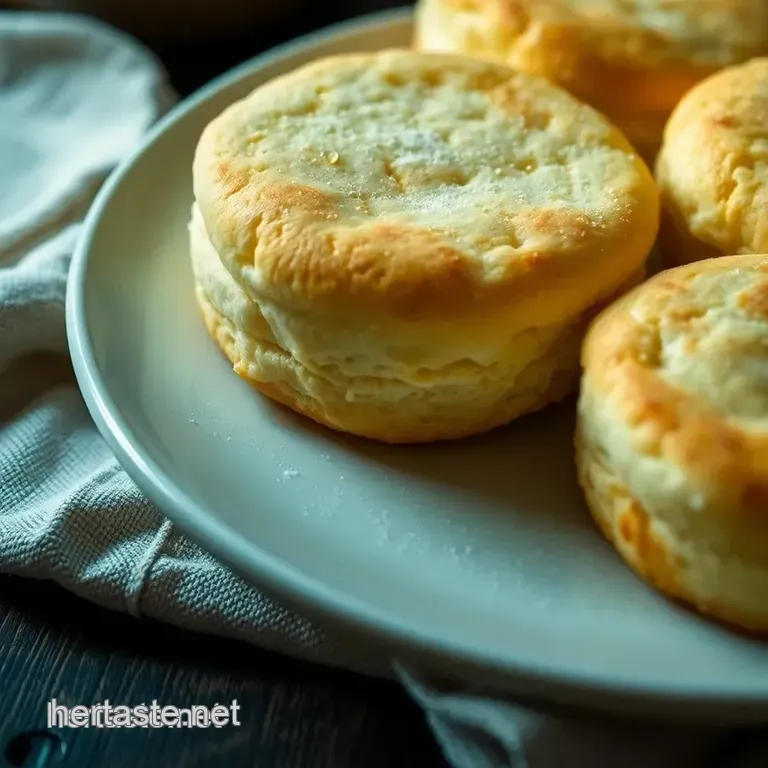
Alright, so here’s the deal: plating techniques can turn a basic breakfast into a fancy brunch. after cooking, split those muffins with a fork for that perfect, rustic appearance.
It’s like nature’s way of saying, “look at me!”
Garnishing is a game changer, too. some fresh herbs or a sprinkle of sea salt can really pop against the golden crust.
You can even drape them next to a vibrant bowl of fresh fruit for a color splash. bright colors make your meal not just delicious but absolutely pretty.
Storage & make-ahead: Muffin 101
Now let’s talk about storage . if you have leftovers (which is rare in my house!), here’s how to keep your muffins fresh.
Store them in an airtight container at room temperature for up to 3 days. for longer storage, pop them in the freezer, and they’ll be good to go for a month.
When you’re ready to use them, just toast them straight from the freezer!
If you’re like me and love prepping ahead of time, you can make the dough a day in advance. just let it rise in the fridge overnight.
You save time, and honestly, this is one of my favorite quick breakfast recipes when i’m running late.
Creative Variations: Mix It Up!
One of the best parts about baking your own muffins is the endless english muffin variations you can try. want a bbq twist? slap on some cooked, seasoned pulled pork between two halves for a killer sandwich.
Feeling adventurous? how about adding a bit of chopped spinach or a sprinkle of cheddar cheese right before cooking? yum!
Dietary adaptations? No problem! Use almond milk instead of regular milk, and swap regular flour for gluten-free flour . Seasonal tweaks like adding pumpkin puree in the fall? Yes, please!
Complete Nutrition Guide: Know What You’re Eating
And let’s not forget about the health benefits. these soft and fluffy muffins can pack a good balance of carbs and proteins.
Each muffin is around 170 calories with 5g of protein . perfect for fueling your morning! if you're counting calories or trying to eat healthier, consider serving them with a side of greek yogurt and fresh fruit for a well rounded meal.
In terms of portion guidance, don’t go overboard; two muffins can easily get you through a busy morning or serve as a light lunch when paired with a salad.
Wrapping It Up!
So, if you’re ready to embark on your homemade english muffins adventure, just remember: take your time, enjoy the process, and don’t be afraid to experiment.
These little beauties might just become your go-to breakfast option! with a few simple muffin baking tips and some creativity, you’re guaranteed a delightful experience.
Now, grab that flour, dust the counter with some cornmeal , and get baking we’re about to create something delicious together! happy cooking!
Frequently Asked Questions
How do I achieve the perfect texture for homemade English muffins?
To get that ideal texture, knead the dough just until it's smooth, about 5-7 minutes. Over kneading can make the muffins tough. Also, ensure you're using the right temperature for yeast activation milk should be warm but not hot.
A low, steady cooking temperature will help achieve a soft interior with a crisp crust.
Can I use whole wheat flour to make homemade English muffins?
Yes, you can substitute half of the all-purpose flour with whole wheat flour for a healthier version. Just keep in mind that whole wheat will give the muffins a slightly denser texture. Adjusting the hydration may also be necessary, as whole wheat flour absorbs more liquid.
What are some variations I can try with homemade English muffins?
You can get creative with your muffins! Consider adding dried herbs like oregano or rosemary for a flavorful twist. Another idea is to stuff them with small cubes of cheese before cooking. Sweet options like cinnamon and raisins can also be delightful!
How do I store leftover homemade English muffins?
Store cooled muffins in an airtight container at room temperature for up to 2 days or freeze them for longer storage. If freezing, wrap each muffin tightly in plastic wrap and then in foil to prevent freezer burn. To reheat, simply toast them from frozen or let them thaw overnight.
What is the best way to enjoy homemade English muffins?
Homemade English muffins are best enjoyed toasted to enhance their texture and flavor. Serve them with your favorite spreads, like butter, jam, or even with eggs for a brunch classic. They're also fantastic for breakfast sandwiches with egg and cheese!
Can I substitute active dry yeast with instant yeast for homemade English muffins?
Absolutely! You can use instant yeast in equal measure without the need for proofing in warm milk. This can save you some time while still producing great results, as instant yeast acts faster in the dough.
Perfectly Toasted Homemade English Muffins