Fry Thai Spring Rolls Crispy Delight
- Welcome to Fry Thai Spring Rolls Crispy Delight!
- A Little History on the Rolled Wonder
- Benefits That Make You Want More!
- Let's Talk Ingredients
- Your Essential Ingredients Guide to Fry Thai Spring Rolls Crispy Delight
- Mastering the Art of Frying Thai Spring Rolls: A Crispy Delight
- Pro Tips & Secrets for Fry Thai Spring Rolls Crispy Delight
- Perfect Presentation of Your Spring Rolls
- Storage & Make-Ahead Tips
- Creative Variations You’ll Love
- Complete Nutrition Guide
- Expert FAQ Solutions
- Wrapping It Up
- 📝 Recipe Card
Welcome to Fry Thai Spring Rolls Crispy Delight!
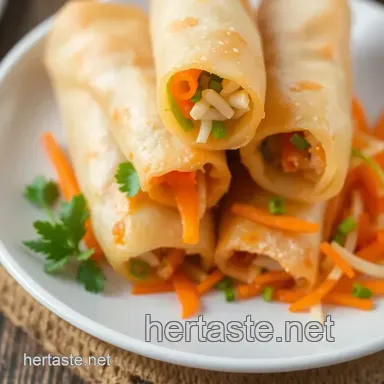
Oh my gosh, have you ever had a crunchy bite of pure joy? for me, that’s what fry thai spring rolls crispy delight is all about! picture this: i’m hosting a little get-together, nervously pacing around my kitchen, and then i pull out these bad boys all crispy, golden, and bursting with deliciousness.
Seriously, they vanish faster than i can say “thai cuisine!”
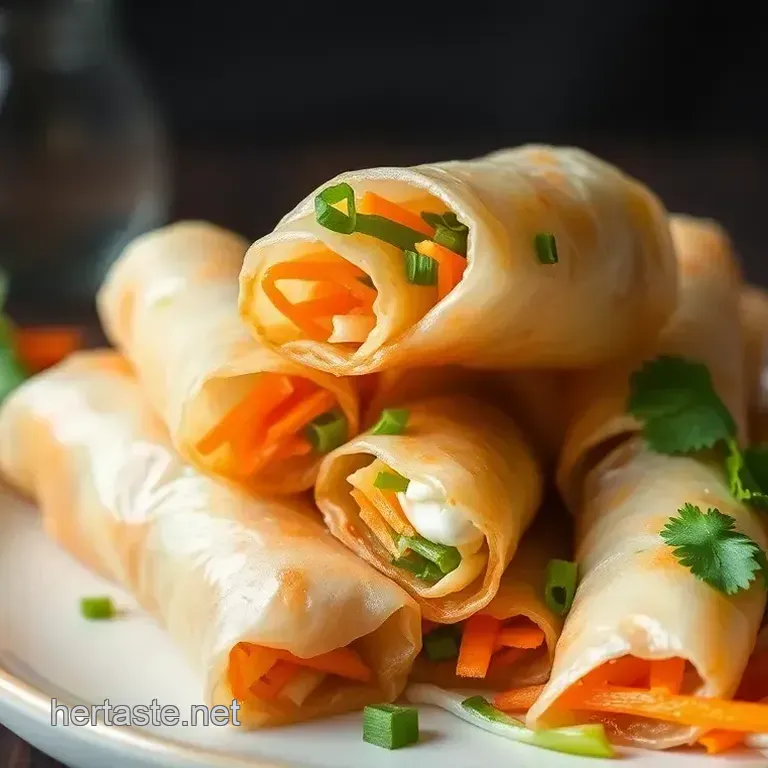
Spring rolls aren’t just food; they’re a whole experience wrapped in delicate, crispy layers. the moment you take a bite, the crunch followed by the explosion of fresh veggies and savory filling feels like a party in your mouth!
It’s no wonder these have become a favorite in thai appetizer recipes and beyond.
A Little History on the Rolled Wonder
The origins of spring rolls can be traced back over 2,000 years to china, evolving into various regions and styles.
From vietnamese spring rolls to thai style crispy spring rolls, each country has its twist. here in the u.s., they’ve become a staple for parties or even a casual weekend snack.
Plus, they’re pretty easy to whip up if you have a bit of patience!
Now, about the time commitment: you’re looking at around 55 minutes total from prep to frying. it’s a medium level endeavor, but if i can do it, so can you! let’s not forget the cost; making these at home can be super economical, giving you about 12 gorgeous spring rolls for just a bit of cash.
Definitely cheaper than takeout!
Benefits That Make You Want More!
Now, onto the good stuff why you need to make these! first off, the health benefits are pretty solid. we’re talking about nutritious appetizer recipes that pack a punch with vibrant, fresh ingredients.
Think about it: shredded carrots, crisp bean sprouts, and maybe shrimp or tofu. all so flavorful!
Plus, they’re perfect for various occasions. whether it’s a birthday party, game day, or just a movie night, these fried snacks are a hit.
Trust me, you’ll impress your friends and family in no time.
Compared to other recipes, like plain chips or store-bought snacks, these spring rolls bring a unique selling point: you get to control the filling! feel like veggie spring rolls? load ‘em up with greens! want something meaty? go for shrimp! it’s all about what you love.
Let's Talk Ingredients
Alright, i know you’re excited to dive into those crunchy goodness, so let’s gloss over what you’ll need. from homemade spring rolls that make you feel chef level to gluten-free spring roll wrappers if that’s your jam, the options are actually endless.
Grab your fresh ingredients: maybe some green onions, your protein of choice, and don’t forget that hearty mix of sauces for dipping!
Imagine serving your fry thai spring rolls with a flavorful spring roll dipping sauce that makes everything taste even better.
You can mesmerize your guests with your newfound culinary skills everybody’s gonna be asking for your easy spring roll recipe !
So, are you ready to grab those ingredients and start rolling? because the crunch is waiting, and your friends are about to become fans of your cooking skills.
Let’s dive into the fun part and talk ingredients, shall we?
Your Essential Ingredients Guide to Fry Thai Spring Rolls Crispy Delight
So, you want to whip up some fry thai spring rolls crispy delight ? well, buckle up because i’m about to take you through a fun journey of flavors and textures.
Let's get all the essential ingredients lined up so that you become the spring roll superstar at your next gathering!
Premium Core Components
First off, let’s chat about those premium core components that make everything pop. For our spring rolls, you’ll need a few key ingredients:
- 1 cup (150g) of shredded carrots
- 1 cup (100g) of bean sprouts
- 1 cup (150g) of finely chopped cabbage
- 1 cup (150g) cooked shrimp or tofu
- 3 green onions , thinly sliced
- 2 cloves garlic , minced
- 1 tablespoon soy sauce
- 1 tablespoon oyster sauce (or mushroom sauce for a vegetarian option)
- 1 teaspoon sesame oil
Quality indicators: Look for crisp veggies, fresh shrimp (if you’re using it), and vibrant colors. Nothing beats that fresh crunch!
Storage guidelines ? fresh ingredients can stay good for a day or two in the fridge, but try to use them as soon as you can.
Nobody wants wilted veggies in their homemade spring rolls!
Signature Seasoning Blend
Now, boring spring rolls? Nope! Let's jazz them up! The magic lies in the signature seasoning blend . Our spring rolls are tangy, savory, and pretty darn amazing because of:
- Essential spices like soy sauce and oyster sauce.
- Fresh herbs like scallions these guys lift your roll to the next level.
- Aroma enhancers like garlic. Oh man, do NOT skip this!
I appreciate how different regions throw in their own twist, especially in Thai cuisine . You can even add a hint of chili for those of you who like to spice things up!
Smart Substitutions
Now let’s keep it real. Sometimes you don’t have everything, and that's okay! Here are some smart substitutions :
- Don’t have shrimp? No problem. How about some cooked chicken or tempeh?
- Oyster sauce out? Switch to hoisin sauce without a hitch.
- Wraps getting tricky? Try gluten-free spring roll wrappers or even rice paper if you’re feeling adventurous!
Oh, and if you're in a pinch, even lettuce can work as a wrapper for an easy spring roll recipe!
Kitchen Equipment Essentials
Let’s not overlook our trusty kitchen tools because good equipment makes for smarter cooking! You’re going to want:
- A mixing bowl (I love a good glass one so versatile!)
- A frying pan or deep fryer (I’m partial to a deep fryer for that crispy goodness).
- Slotted spoon (life changing for removing those hot rolls).
- A cooling rack to keep them crispy after frying.
Honestly, it would be a crime not to measure out those ingredients. Remember, prep is key to making delicious homemade spring rolls .
Wrapping Up
So, we’ve warmed up with the ingredients, and now you’re all set to roll with it literally! understanding these essentials will guide you on how to roll spring rolls without ripping them, and get you on your way to mastering those cooking techniques for spring rolls .
Next, i’ll share those step-by-step instructions. stick around for that crunch you’ve been dreaming about, and before you know it, your friends will be raving about your savory spring roll dips and crispy veggie snacks.
It’s time to roll out some fried snacks that’ll make your party unforgettable!
Mastering the Art of Frying Thai Spring Rolls: A Crispy Delight
Let's be real who doesn’t love crispy spring rolls ? these bad boys are like a crunchy hug for your taste buds.
But let me tell you, creating the perfect fry thai spring rolls crispy delight can be a little daunting at first.
Don’t worry; i’ve got your back!
Essential Preparation Steps
Before diving in, you've got to get your kitchen organized. first up: mise en place . this fancy term just means, “everything in its place.
” chop your veggies and prep your ingredients beforehand. trust me, it makes everything smoother.
Next, tackle time management . The total prep time is about 55 minutes so set a timer! You don’t want to end up crunching on soggy rolls.
Now, let's talk organization strategies . lay everything out so you can easily reach each ingredient. keep your wrappers covered with a damp kitchen towel to prevent them from drying out.
And please, keep that deep frying area clean and safe! hot oil can be dangerous watch your step and try not to burn down your kitchen.
Step-by-step Process
Ready to roll? Here's how to make your Fry Thai Spring Rolls:
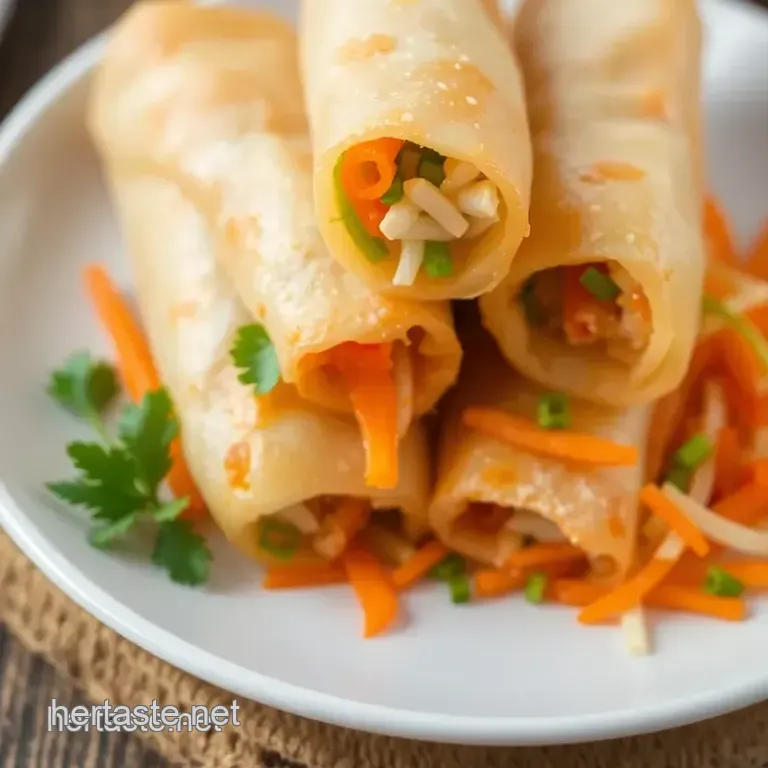
Prepare the Filling : Mix together that vibrant blend of shredded carrots, bean sprouts, chopped cabbage —you get the picture. Add that savory soya and oyster sauce for an authentic taste.
Chill It : Give that filling 30 minutes in the fridge. It helps all the flavors meld together like they're old buddies.
Assembly time : grab a spring roll wrapper. place a couple of tablespoons of that delicious filling onto one corner, roll it up tight, and don’t forget to seal it with a bit of beaten egg.
The Fry Zone : Heat that vegetable oil to 350° F ( 175° C) . Fry those spring rolls in batches, about 3- 4 minutes each until golden brown.
Serve It Up : Nothing beats freshly fried rolls. Serve them hot with your favorite spring roll dipping sauces —and maybe show off a little by suggesting some homemade sauces too.
Expert Techniques
Okay, let’s get into the nitty gritty. temperature control is crucial here. too hot, and your rolls will burn; too cold, and they’ll absorb oil like a sponge.
Your goal? perfect golden brown !
When frying, timing precision is key. Each batch needs your full attention. Keep an eye on the clock every second counts when you’re aiming for that ideal crunch!
Don’t forget about quality checkpoints. Before pulling those rolls out, they should look crispy and golden. Don’t jump the gun and let them get soggy in that oil.
Success Strategies
Now, let’s avoid the rookie mistakes. one common pitfall? overfilling the spring rolls. it makes rolling and sealing a whole lot trickier.
Aim for a balanced filling just enough for flavor without making them burst.
Keep an eye on those quality assurance tips . Are they crunchy when you bite into them? If they’re soggy, adjust your frying temperature.
Want to impress your friends? Go for some make-ahead options ! You can prep those spring rolls a day in advance and fry them fresh just before serving.
Before I let you go, here’s a little list of serving suggestions to really wow ‘em: pair these tasty little snacks with a Thai salad or a refreshing iced tea.
So there you have it! with these cooking techniques for spring rolls , even you can nail that street food vibe right in your kitchen.
Say hello to your new go-to recipe for appetizers that’ll have everyone coming back for seconds.
And if you’re itching for more delectable knowledge, stick around for Additional Information to further enhance your spring roll game!
Pro Tips & Secrets for Fry Thai Spring Rolls Crispy Delight
Okay, let's dive into making fry thai spring rolls crispy delight ! trust me, these little bundles of joy are not just a feast for the taste buds; they’ll have your friends and family asking for more and you’ll finally feel like the kitchen superstar.
Here’s the scoop on making these crispy delights even better.
First off, pay attention to your frying technique! if you dive straight in without your oil hitting the sweet spot of 350° f ( 175° c) , you might end up with greasy or burnt rolls.
Get a kitchen thermometer, trust me, it’ll save you a lot of heartache. you want those spring rolls crispy, not soggy!
Don’t skimp on the flavor packing goodies in your filling. use fresh ingredients and get creative! adding a hint of ginger or some chopped chilies can elevate these from good to out of this world .
Maybe incorporate some fresh herbs like cilantro for an extra layer of aromatic goodness.
While you’re filling those wrappers, don’t overstuff! i made that mistake once and let me tell you the rolls exploded in the oil like confetti at a party.
Just a couple tablespoons of filling will do. it's all about that perfect balance.
Perfect Presentation of Your Spring Rolls
Now that your spring rolls are frying away, let’s chat about presentation because let’s be real, we eat with our eyes first.
Plating is key! try laying a few spring rolls on a vibrant or textured plate. add a sprig of mint or a slice of lime as a pop of color.
Drizzle on some sweet chili sauce or hoisin sauce in the corner for that pinterest worthy vibe.
Garnishing is another little touch that goes a long way. a sprinkle of chopped peanuts or sesame seeds on top not only looks snazzy but adds an inviting crunch, too.
Oh, and how about pairing them with some crunchy vegetable sticks ? cute and delicious!
Storage & make-ahead Tips
Got leftovers (if that’s even possible)? Here’s how to store those bad boys:
Let the spring rolls cool completely before putting them in an airtight container. They’ll be good for around 3-5 days in the fridge, but let’s be honest who wants soggy spring rolls?
If you want to prep ahead, you can assemble them and keep them covered in the fridge for up to 1 day before frying.
Just ensure they’re wrapped in a damp kitchen towel to keep them from drying out.
When you’re ready to savor those spring rolls again, gently reheat them in a pan over medium heat for a couple of minutes until they're warm and crispy again. No microwave, please!
Creative Variations You’ll Love
Let’s mix it up! While the basic Fry Thai Spring Rolls Crispy Delight recipe is fantastic, variations can take it to another level.
For a vegan twist , swap shrimp with more veggies! think bell peppers, mushrooms, and maybe some avocado slices. if your friends love spice, toss in some fresh minced thai bird chilies or a dash of crushed red pepper.
Feeling seasonal? Add shredded pumpkin in the fall or sautéed asparagus in the spring for a delightful touch of flavor.
Complete Nutrition Guide
Let’s break down the goodness in these tasty rolls. each spring roll averages about 150 calories and delivers 5g of protein not too shabby for a savory treat! they’re great for snacking or serving at parties since you can control the portions easily.
They pack some nutritious veggies, too. That means you’re not only enjoying a crunchy snack but getting some vitamins and fiber as well.
Depending on your dietary needs, you can play with gluten-free spring roll wrappers or swap in healthier frying methods. Air-frying is a game changer if you're looking for a lighter option!
Expert FAQ Solutions
Every cook runs into questions, so let’s tackle some common ones!
If your rolls aren’t crispy, check your oil temperature and don’t overcrowd the pan when frying. want to know how to seal perfectly? a bit of that beaten egg works wonders as glue.
Stocked up on extra fillings? You can totally mix and match! Just keep those flavors in balance, or you might end up with a confusing flavor experience.
Wrapping It Up
So there you have it the lowdown on making your fry thai spring rolls crispy delight! between the pro tips, creative variations, and storage secrets, you’re more than ready to impress at your next party.
Homemade spring rolls are that magic touch that can turn a simple gathering into a flavorful feast.
Just remember, cooking is about experimenting. don’t be afraid to play around with flavors and make these rolls your own! so go ahead and crank up that oil.
Your taste buds will thank you!
Fry Thai Spring Rolls Crispy Delight