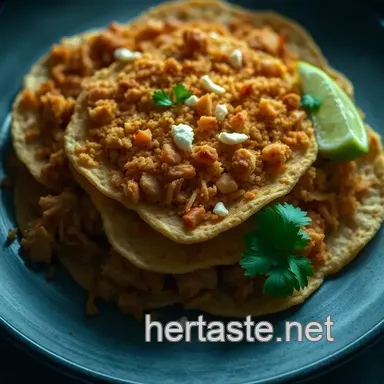
Crunchy Chalupas with Flavorful Fillings
Let’s Chat About Chalupas
Let me take you back to a sunny saturday when my best friend invited me over for a taco night.
I was pumped! i mean, who doesn't love tacos? as we were sitting around munching down on some tasty bites, she pulled out a plate of chalupas .
Oh my gosh, guys! my taste buds did a happy dance. crispy outside, loaded with flavorful fillings, it was love at first bite.
I knew right then and there i had to learn how to whip these bad boys up myself.
What’s the deal with chalupas? chalupas have roots deep in mexican cuisine, particularly from the puebla region. picture it: a crispy fried tortilla topped with all your fave ingredients like spicy meats, zesty beans, fresh veggies, and some creamy goodness.
You just can’t beat that combination! these guys aren’t just a hit at taco trucks they’ve made their way into homes across the u.
S., thanks, in part, to fast food joints like taco bell. everyone’s hyped about chalupa supreme , and i get it!
How easy is it? most folks consider a chalupa to be of medium difficulty, mainly because of the frying . don’t let that scare you once you get the hang of it, it’s a breeze!
You’ll need around 20 minutes of active prep time, another 30 minutes for waiting on dough, and about 20 minutes for cooking.
As for cost, expect a wallet friendly dinner that yields 4 servings . perfect for a family meal or a small gathering with friends.
Why You Need to Try Chalupas
You might be wondering: why should I make chalupas when there are plenty of taco recipes out there? Well, let me break it down.
First off, health benefits can’t be overlooked. by using fresh ingredients, you control the flavors and the nutrition. homemade chalupas are loaded with protein from the fillings think steak chalupa or shredded chicken.
Plus, if you use whole grains for the shells, even better!
Then there’s the versatility. chalupa shells recipe can be adapted to fit whatever mood you’re in. taco tuesday? great! craving something festive for a special occasion? perfect! kid-friendly? absolutely!
Toss in some extra toppings or switch up the proteins with copycat taco bell recipes, and you’re golden.
One of the coolest things about making your own chalupas is that they come with a story. think about it: when you serve these up, you’re sharing a piece of vibrant culture with your friends and family.
It’s not just a dish; it’s a way to connect over delicious food.
Time to Gather Ingredients
Ready to dive into creating your own crunchy chalupas? you’ll need a handful of basic ingredients, which you probably have on hand already.
We’re talking about masa harina for the dough essentially the star of the show! add in some cooked chicken or beef, refried beans, and your favorite toppings like lettuce and tomatoes.
And don't forget the chalupa sauce that creamy drizzle that takes your chalupas from good to out-of-this world .
So, gather your ingredients, roll up your sleeves, and let’s get this party started! trust me, when you bite into that fresh, crispy chalupa topped with all the fixings, you’ll understand why i’m raving about them.
Can't wait to share this journey with you as we explore the flavors and maybe even unleash our inner taco truck chef together! happy cooking!
Essential Ingredients Guide
Let’s talk about making the best chalupas ever and the ingredients that get you there. You know those crispy, flavor packed beauties that deliver a punch of flavor? Yeah, that’s what we’re aiming for!
Premium Core Components
First up, we need the premium core components . Here are some solid staples to have on hand:
- Masa Harina : This is the magic flour for those homemade chalupa shells . You’ll need 2 cups (240 g) . Look for a fine texture and a wholesome smell.
- Warm Water : You're going to need 1 cup (240 ml) . It should be, like, comfortably warm to help the masa come together.
- Salt : Just ½ teaspoon (3 g) to enhance the flavors.
Storage ? keep your masa harina in an airtight container away from moisture. if you buy a big bag, it can last about 6 months .
Tip : always check for freshness by smelling or looking for clumps.
Signature Seasoning Blend
Next, let's dive into that signature seasoning blend . A little spice can turn casual into culinary!
- Chili Powder : You’ll need 1 teaspoon (2 g) . This is the backbone of many taco truck recipes, creating that signature kick.
- Cumin : Just ½ teaspoon (1 g) adds warmth. It’s like a hug in spice form.
- Salt and Pepper : Keep these handy, but customize according to your taste.
When picking fresh herbs? Go for vibrant greens! Basil, cilantro, or oregano can elevate your chalupa flavors! Find what speaks to you personally.
Smart Substitutions
Oh snap, out of that special ingredient? Don’t sweat it. There are smart substitutions that can still have your chalupas sing:
- If you’re out of masa harina , you could use all-purpose flour, but the texture will differ. For a cornier taste, try cornmeal .
- Need it dairy-free ? Greek yogurt is a great swap for sour cream.
And hey, if you’re in a pinch, canned refried beans are a lifesaver. Yes, please!
Kitchen Equipment Essentials
Now, let’s chat about those must have tools . You don’t need fancy stuff here. Just good ol’ reliable kitchen gear:
- Mixing Bowl : Get a decent sized one to combine that masa and water.
- Rolling Pin : For flattening those dough balls. Or a glass will do in a pinch!
- Cast Iron Skillet : This is perfect for frying the chalupas to crispy perfection.
- Slotted Spoon : To drain those bad boys effortlessly.
Tip : Organize your kitchen so everything’s within reach when you're cooking. It really helps the flow.
Getting Ready to Make Chalupas
Having a blast with your ingredients is crucial! And believe me, I’ve been there like the time I forgot to add salt and my friends were like, “What’s going on here?” The dish may have looked great, but it lacked flavor!
So, remember to have all your ingredients ready and be a bit playful. you can experiment on this journey of making chalupas .
Whether you whip up a steak chalupa or go vegan with some zesty veggies, the possibilities are endless!
Ready for the fun part? Let’s dive into making those crunchy chalupas with flavorful fillings! This next section will guide you through whipping these up right in your kitchen just like they do at Taco Bell, but, you know, better !
Mastering the Art of Chalupa Cooking
Ah, chalupas! is there anything better than a crispy, tasty chalupa packed with delicious fillings? i think not! these gems are a staple in my kitchen, especially when i want to impress guests or just treat myself to some good old comfort food.
Not to mention, it’s pretty fun to say “chalupa!” but before we dive into the recipe, let's tackle the professional cooking method to make your chalupas the best they can be.
Essential Preparation Steps
First things first, you gotta get your act together! this is where mise en place comes in. it’s a fancy french term meaning “everything in its place.
” gather your ingredients before you start cooking. having everything ready saves you time and makes the cooking process a breeze.
Time management is key! i recommend giving yourself 20 minutes of active prep, 30 minutes for chilling, and 20 minutes for cooking.
Get a timer going and stick to it.
Let’s talk organization. i like to group my ingredients by the steps in the recipe. like, if you’re frying chalupa shells, make sure the oil is heated while you’re prepping your filling.
It makes everything flow better!
And always keep safety in mind. if you're frying, make sure to have a thermometer handy. you want that oil at 350° f .
Too hot, and those shells will burn like toast nobody wants that!
Step-by-step Process
Ready to get cookin’? Here’s what to do:
Prepare the Dough:
- Combine 2 cups of masa harina with 1/2 teaspoon salt and 1 cup of warm water . Knead until smooth. Cover and let it rest for 30 minutes .
Shape the Tortillas:
- Divide the dough into about 8 pieces, roll them into balls, and flatten using a rolling pin.
Fry the Tortillas:
- Heat that vegetable oil to 350° F in a cast iron skillet. Fry each tortilla for 2- 3 minutes per side until golden brown. Drain on paper towels, and boom perfectly crunchy chalupa shells!
Prepare the Filling:
- In a skillet, mix together 1 cup of shredded chicken or beef with 1 cup of refried beans , 1 teaspoon chili powder , and a pinch of salt. Heat until it’s all warmed through.
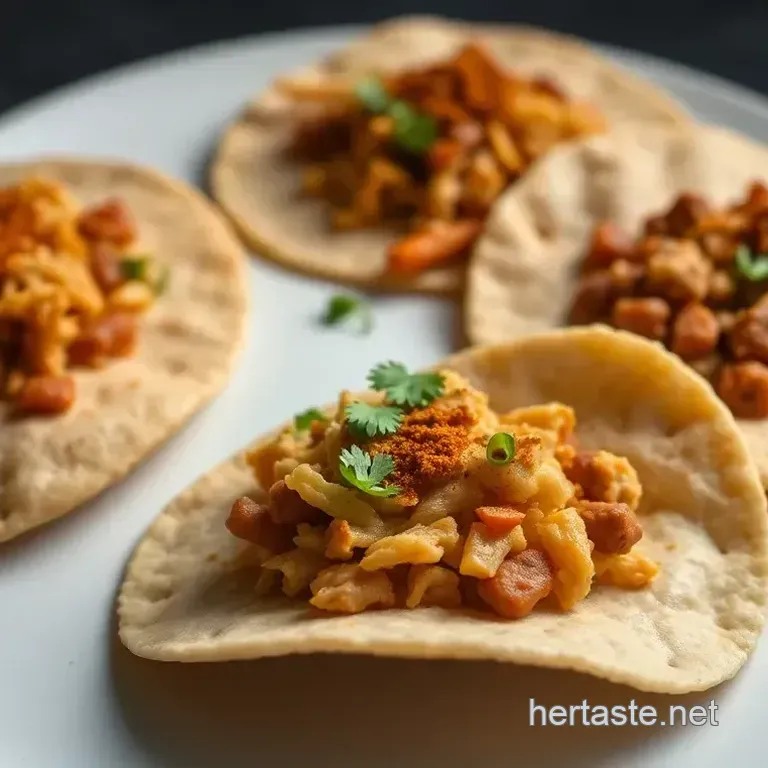
Assemble Those Chalupas:
- Layer your filling onto each crispy shell, add your favorite toppings, and you’re good to go!
Expert Techniques
To take your chalupas to the next level, try these pro tips:
Use a Quality Checkpoint: Always taste test your filling. If it’s bland, sprinkle in some extra spices. You can never go wrong with a bit of cumin or chili powder .
Troubleshooting: If your shells puff up, no worries! Just poke a hole with a skewer while frying to let the steam escape.
Timing Precision: Keep an eye on that timing. You don’t want to over fry, or you will end up with something more suited for the trash than your plate.
Success Strategies
Let’s face it: we’ve all made mistakes in the kitchen. Here are some common pitfalls to avoid:
- Don’t skip the resting period for your dough. It’s crucial for a better texture.
- Avoid letting your oil get too hot. You can always adjust the heat if it starts to smoke.
- If you prep a lot of filling, you can save time by making it ahead of time. Homemade chalupa filling keeps in the fridge for up to a week!
Quick Tips for the Best Chalupa
If you follow these simple strategies, you will never miss. Always double check that oil temperature, and don’t rush through frying.
Now, how to make it even better? Add some homemade chalupa sauce on top or feel free to go wild and try out different taco truck recipes that highlight fresh flavors.
Before we wrap up, if you haven’t tried making diy chalupa shells before, trust me, it’s worth it! for a cool twist, consider using corn taco shells as an alternative base for some excitement in textures.
Well, friends, that's a wrap on crafting the perfect chalupa! i can't wait for you to try this and see how it turns out.
Your taste buds deserve it, don’t you think? happy cooking!
Additional Information...
Stay tuned for more amazing recipes, tips, and all things food that’ll make your kitchen shine! 🌮
Additional Recipe Information: Unlocking Flavorful Chalupas
Oh my gosh, let’s talk chalupas ! these crispy treats are more than just a meal; they’re a fiesta on your plate! whether you’re whipping up a classic like the taco bell chalupa or getting creative with your own chalupa shells recipe , i’ve got some pro tips and fun twists that will take your cooking to another level.
Pro Tips & Secrets
Chef's personal insights: here’s a little secret from my kitchen: always taste as you go. the joy of cooking comes from making the dish your own.
A pinch of this, a dash of that it’s what makes each chalupa unique!
Time saving techniques: prepping your fillings ahead of time can save you a bunch of time later. i often cook a big batch of shredded chicken and have it on hand.
It’s perfect for a quick steak chalupa recipe or just on a salad.
Flavor enhancement tips: enhance your fillings with spices. just sprinkle in some garlic powder or cayenne pepper your taste buds will thank you.
And don’t forget that chalupa sauce ; it can kick things up a notch!
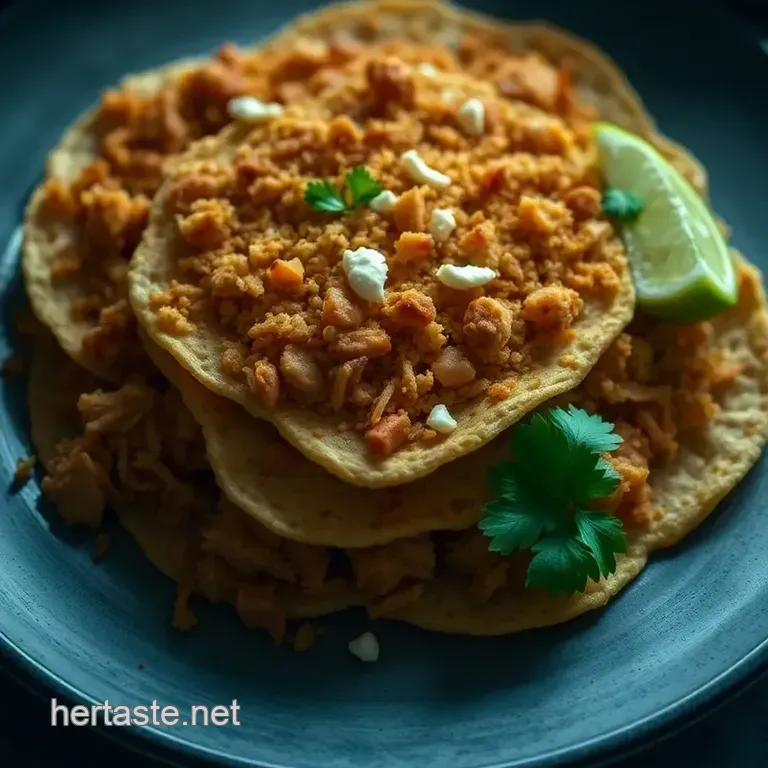
Presentation Advice: A well plated dish is half the experience. Layer your chalupa fillings to create height, and drizzle some sour cream artfully on top for a restaurant vibe right in your home.
Perfect Presentation
Let’s make those chalupas Instagram worthy !
Plating Techniques: Start with the crispy chalupa shell as your base and gently layer everything on top. You’ll want to show off those gorgeous ingredients!
Garnish Ideas: Chopped cilantro or green onions can add a pop of color. A squeeze of lime is always a crowd pleaser, plus it brightens the flavor.
Color Combinations: Think vibrant! Use fresh tomatoes, green lettuce, and maybe some black olives for a stunning contrast. A feast for your eyes as well as your taste buds!
Visual Appeal Tips: Remember that food should look as great as it tastes. Play with textures creamy cheese against crunchy lettuce sets off a delicious visual balance.
Storage & make-ahead
Got leftovers? No worries; here’s how to keep that yummy flavor alive longer!
Storage Guidelines: Store your chalupa shells in an airtight container. They can last in the fridge for about 3 days , but I’m not gonna lie; they’re best fresh!
Preservation Methods: If you want to keep them longer, freeze the shells. Just layer them between sheets of parchment paper.
Reheating Instructions: Pop the shells in the oven at 350° F ( 175° C) for about 10 minutes to crisp back up. Trust me, the crispy factor matters!
Freshness Duration: For the fillings, keep them separate from the shells. They’ll stay fresh for about four days in the fridge.
Creative Variations
Now, let's get wild with flavors!
Flavor Adaptations: Spice things up with roasted veggies or different meats. How about some smoky chipotle? Yum!
Dietary Modifications: gluten-free or vegan? Sub out the masa harina for DIY chalupa shell made from gluten-free flour, and use beans for protein. Easy peasy!
Seasonal Twists: Try incorporating seasonal veggies. Squash in the fall or fresh corn in summer can brighten up your chalupas!
Regional Variations: Think outside the box! A southern twist with BBQ pulled pork in your chalupa shell could become your new obsession. Seriously why not?
Complete Nutrition Guide
A tasty meal can also be nutritious.
Detailed Breakdown: One serving of these chalupas packs about 400 calories . Not bad for all that flavor!
Health Benefits: Loaded with protein from the meat and fiber from beans, they can be a balanced option.
Dietary Considerations: Watch the sodium if you're using store-bought ingredients. Homemade fills you with that love, you know?
Portion Guidance: Four servings seems just about right to not overstuff yourself but enough to feel satisfied.
Cooking chalupas can be a delightful experience, with room to innovate! whether you’re channeling your inner taco truck recipes or creating your own chalupa masterpiece , remember, food is about joy.
So, grab your ingredients, invite your friends over, and get cooking! you got this!
Frequently Asked Questions
What exactly is a chalupa?
A chalupa is a traditional Mexican dish consisting of a crispy fried tortilla topped with a variety of fillings like meats, beans, and fresh vegetables. Originating from the Puebla region, it’s known for its delightful crunch and diverse toppings making each bite a fiesta of flavors!
Can I make chalupas ahead of time?
Absolutely! You can prepare the dough and fillings ahead of time, storing them separately in the fridge. Just make sure to fry the tortillas right before serving to maintain their crispy texture. Reheating isn't recommended as they might lose their crunch.
What are some good variations for chalupas?
If you're feeling adventurous, try using black beans instead of refried beans for a vegetarian twist or add spiced grilled fish for a lighter option. You could also mix in sautéed veggies or avocado slices for extra flavor and texture. Get creative!
How can I keep my chalupas crispy after frying?
To keep your chalupas crispy, drain them well on paper towels immediately after frying. Avoid stacking them on top of each other, as moisture can make them soggy. You might even consider putting them in a low oven (around 200°F or 90°C) while you finish frying the others.
Are chalupas healthy?
Like many fried foods, chalupas can be indulgent, with about 400 calories per serving. However, they can be made healthier by using lean meats, reducing the oil for frying, opting for Greek yogurt instead of sour cream, and loading up on fresh veggies. Moderation is key!
What should I serve with chalupas?
Chalupas are delicious on their own but serve them with sides like fresh guacamole, tortilla chips, or a vibrant corn salad for a complete meal. A chilled margarita or agua fresca would pair perfectly for that festive touch!
Crunchy Chalupas With Flavorful Fillings