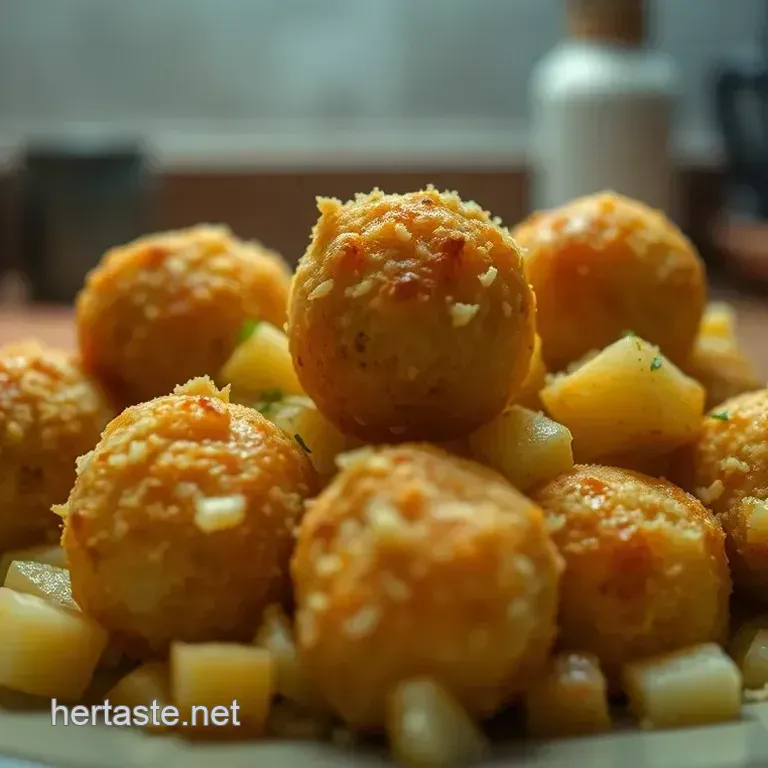
Crispy Potato Balls with a Cheesy Twist
Look into into Deliciousness: How to Make Potato Balls
Hey there, food lovers! let me take you back to a cozy evening at my buddy jake’s house. picture this: a small get-together overflowing with laughter and the aroma of fried food wafting through the air.
Honestly, it felt like those classic friends episodes where someone shows up with a giant pizza. but instead, they brought monumental potato balls ! i still remember that first bite crispy on the outside, gooey cheese on the inside, and pure happiness on a plate.
Ever since, i’ve been on a quest to discover how to make potato balls that would make jake’s mom proud.
Let’s dive in, shall we?
What’s the Buzz About Potato Balls?
You might be wondering where these tasty little bites came from. well, potato balls have a colorful history! they’re inspired by dishes from around the globe, like indian aloo tikki and italian croquettes.
Over the years, they’ve become super popular here in the states too turning into must have finger foods at parties and gatherings.
Making potato balls is a cinch. with about 1 hour total time, you’re looking at 15 minutes of prep , plus some chill time, and about 15 minutes of cooking .
And don’t sweat it if you’re a newbie in the kitchen; they’re easy enough for anyone to whip up. personally, i love that you can add your own twist or keep it simple talk about versatile !
Why You’ll Love Them
Let’s be real. who doesn’t adore a good fried food? but here’s the kicker: potato balls offer more than just mouth watering flavor.
They’re packed with nutrients too! when made with wholesome ingredients like potatoes and cheese, you get a filling snack without breaking the calorie bank.
Yup! it’s a tasty balance!
Perfect for parties, game nights, or even a cozy family dinner, these nuggets of joy fit right into any occasion.
You can even jazz them up with different fillings, like crispy bacon or sautéed veggies! no wonder they’re a hit at get-togethers.
Plus, they’re much less complicated than crafting an entire meal that could end in disaster (we’ve all seen those nailed it moments on social media, right?).
A Snack That Stands Out
What makes potato balls stand out from other snacks? let me tell you. they’re not just your average recipes snacks .
The creamy cheese center mixed with perfectly seasoned potato dough creates a delightful contrast that will keep your friends asking for more.
Plus, they’re a fabulous conversational starter! “oh, you made potato balls ? you’re fancy!”
The nice thing about these crispy bundles of joy is that they’re highly adaptable. want to make them gluten-free? switch out the breadcrumbs.
Feeling adventurous? throw in some spices! trust me, you’re going to want to show off your take on this classic recipe at your next game day party.
Now, are you itching to find out how to assemble these beauties? let’s hop on over to our ingredients section! you’ll want to gather some basic kitchen staples and maybe a few extra goodies to make them your own.
Trust me; you won’t regret it!
So grab your apron, roll up those sleeves, and let’s create some magic in the kitchen!
Essential Ingredients Guide for Crispy Potato Balls
When it comes to whipping up tasty recipes like crispy potato balls , knowledge of your ingredients can make or break your meal.
So, let’s break it down, like we're just chit chatting over coffee. this isn’t just about cooking; it’s about making something delicious !
Premium Core Components
Alright, first up, let’s talk about what you need. To nail this recipe, you’ll want quality ingredients. Here’s what to keep in mind:
Detailed Measurements:
- For success in the kitchen, stick to 2 cups (480g) of peeled, diced potatoes. In the metric world, that’s about 480g . Precision matters!
Quality Indicators:
- When you grab your potatoes, look for those that feel firm. Any soft spots? Nah, pass on those, my friend!
Storage Guidelines:
- Potatoes like a cool, dark spot. They’ll last about 2-3 weeks in a pantry but, seriously, check them frequently.
Freshness Tips:
- Select potatoes that have smooth skins and don’t smell funky. Give ’em a sniff! If they smell musty, move along!
Signature Seasoning Blend
Now that we’ve got our staples down, let’s jazz them up with flavors! The seasoning is where the magic happens.
Essential Spice Combinations:
- Think about mixing in ½ teaspoon garlic powder and ½ teaspoon onion powder . Mouthwatering, right? These elevate the taste to a whole new level.
Herb Selections:
- A sprinkle of chives or parsley can totally brighten things up. Freshness matters!
Flavor Enhancers:
- Don’t overlook your cheese choice! Go for sharp cheddar or gooey mozzarella. They melt like a dream!
Regional Variations:
- Want to shake things up? Try adding spices like cumin for a bit of an Indian twist, or throw in some Italian herbs!
Smart Substitutions
Let’s face it, we’ve all been there running out of something crucial. So here are my go-to smart substitutions:
Common Alternatives:
- If you're out of garlic powder, fresh garlic will do in a pinch. Just use about 1 clove .
Dietary Modifications:
- For a vegan vibe, swap the butter with olive oil and the cheese for a plant based option!
Emergency Replacements:
- No breadcrumbs? Use crushed crackers or even cornflakes. It sounds wild, but trust me, it can work!
Seasonal Options:
- Sweet potatoes are available year round and make a perfect twist if you feel adventurous.
Kitchen Equipment Essentials
Alright, let’s gear up for battle. Here’s what you’ll need to tackle this crunchy snack:
Must Have Tools:
- A large pot, mixing bowl, slotted spoon, and frying pan or deep fryer are essentials. Get cozy with these!
Alternative Equipment Options:
- If your frying pan is MIA, you can bake these bad boys! Just line a baking sheet, and you’re golden.
Preparation Tips:
- Keep everything organized. Set up your breading station with flour, eggs, and breadcrumbs so you don’t end up with a total kitchen disaster.
Storage Solutions:
- Got leftovers? Store them in an airtight container in the fridge for up to 3 days .
And there you have it, my friend! you’re all set to venture into the world of making crispy potato balls .
With these essential ingredients and smart tips , you'll turn out delicious snacks that will impress anyone who tries them.
Plus, once you learn how to make potato balls , there’s no more boring ol’ spuds for you!
Next up, we’ll dig into step-by-step instructions to get those tasty potato recipes rolling. Stay tuned, and let’s make some magic happen in the kitchen!
Professional Cooking Method: The Art of Crafting Crispy Potato Balls
Cooking is like magic, right? you take a bunch of humble ingredients and turn them into something people crave. today, let’s dive into a fun yet professional cooking method that’ll take your potato game to the next level.
We’re focusing on how to make potato balls that are crispy on the outside and ooey gooey cheesy on the inside.
I promise, they’re going to be a hit at your next gathering!
Essential Preparation Steps
Before you get your hands dirty, let’s talk mise en place . this fancy french term just means “everything in its place.
” get all your ingredients laid out and prepped. it’s like the calm before the storm you don’t want to be fumbling around while your oil’s heating up!
Time management is key here. set aside about 15 minutes for prep , 30 minutes for chilling , and then 15 minutes for cooking .
While the potato balls chill, you can clean up or sip on a little something refreshing. you see, good organization can save you a lot of headaches.
Safety first! if you’re frying, make sure to use a thermometer to keep the oil at a steady 350° f ( 175° c) .
And, please, be cautious of splatters. oil burns hurt, trust me i learned that the hard way.
Step-by-step Process
Okay, here we go! Let’s break this down into clear numbered instructions so you can follow along easily:
Cook the Potatoes: Boil your diced potatoes in salted water until they’re fork tender, which should take about 10- 15 minutes . Don’t forget to drain them well!
Prepare the Dough: Mash those suckers up with butter, milk, salt, and pepper until smooth. You’ll want to add ¼ cup of flour too this will help bind everything.
Make the Filling: In another bowl, mix your cheese and whatever goodies you want (like bacon or sautéed veggies).
Form the Potato Balls: Take a bit of your potato mixture, flatten it, add that delicious filling, and roll it all up into a ball. Repeat until you’re all out of mixture.
Chill: Plop those potato balls on a baking sheet and let them chill in the fridge for 30 minutes . This helps them hold shape while cooking.
Coat the Potato Balls: Set up a mini breading station with flour, beaten eggs, and breadcrumbs. Roll each ball first in flour, then dip in egg, and finally coat in breadcrumbs.
Fry: Heat your oil to 350° F ( 175° C) and fry those little beauties in batches for about 3- 4 minutes until golden brown. Drain them on paper towels.
Serve: Hot and crispy potato balls coming right up! Serve them with your favorite dipping sauce and watch everyone rave about them.
Expert Techniques
Here’s where I share some of my hard won wisdom:
Critical Steps: Make sure to chill your potato balls! It’s a game changer that helps them maintain shape.
Quality Checkpoints: When frying, look for that golden color. Burnt bites are a bummer don’t let that happen!
Troubleshooting Tips: If your potato balls fall apart while frying, try adding more flour to the dough next time.
Success Strategies
Now let’s avoid some common mistakes. one biggie is rushing the chilling process. don’t skip it; your whole dish depends on it! and while we’re talking success, ensure your oil is hot enough.
If it isn’t, your crispy potato balls will end up soggy instead of delicious.
You can also think ahead these beauties are great for make-ahead options. Just prep and chill them, and fry right before serving. You’ll appear like a kitchen pro!
Wrapping It Up
So, there you have it your guide to making those crispy potato balls with a cheesy twist . they're versatile enough for a snack, appetizer, or side dish.
I can’t wait for you to try this!
And if you’re still hungry for more kitchen adventures, keep an eye out for my Additional Information section because I’ll be diving into more delicious snacks recipes and tips to keep your cooking fresh and fun!
Unlock the Secrets to Perfect Crispy Potato Balls
Oh my gosh, let’s talk about something magical: crispy potato balls with a cheesy twist . these little delights are not just snacks; they're an experience! whether you're looking for a cute appetizer or just a tasty way to munch on potatoes, this recipe has got you covered.
And believe me, your friends and family will be singing your praises!
Pro Tips & Secrets
Before you dive into how to make potato balls , let me share some of my go-to tips and tricks that I’ve learned through a few cooking misadventures.
Chill out! allowing those potato balls to chill for at least 30 minutes can make a world of difference.
It helps them keep their shape while frying. trust me, nobody wants a potato pancake instead of crispy balls.
Another time saving technique ? while your potato balls are chilling, set up your breading station. it can feel like a bit of a chore, but you’ll thank yourself later because it streamlines the whole process.
For those who want to expand flavors , consider adding a pinch of smoked paprika or even some freshly grated cheese into the potato mixture.
This will take you to flavor town and make those potato balls dazzle.
Perfect Presentation
Now, let’s get fancy! presentation can really elevate your dish. plating is all about those wow moments. once you've fried your potato balls, stack them up in a fun way or scatter them around a dipping sauce like garlic aioli.
Garnish ideas ? toss on some fresh chopped chives or parsley for a pop of color. you can even sprinkle a little paprika on top for that extra visual appeal.
And hey, color combinations matter! keep it vibrant think greens, reds, and yellows on that plate.
Storage & make-ahead
Planning for a party? you totally can make these delicious snacks ahead of time. just chill the un-fried balls in the fridge.
They're good for up to 24 hours before frying. once fried, you can store leftovers in an airtight container in the fridge for about 3 days .
When it’s time to reheat, just pop them back in the air fryer or a preheated oven at 350° f ( 175° c) until they’re crisp again.
Creative Variations
Think about switching it up! Feeling adventurous? Try adding some jalapeños for a kick. You could even go all vegetarian by including some sautéed veggies in the mix. There's no limit!
As the seasons change, so can your potato ball flavors. in the fall, think about adding pumpkin or caramelized onions.
For a summer twist, throw in some grilled corn and fresh herbs. even cultural twists like adding italian seasonings can give your potato balls a whole different identity.
Complete Nutrition Guide
Alright, let’s chat about nutrition. one serving of these potato balls has around 250 calories . not gonna lie, they can be a bit rich, especially when deep fried.
But hey, balance is key! pair them with a crisp salad for some added health.
These potato recipes side dishes are a great way to sneak in some nourishment without sacrificing fun. plus, with endless variations, you can cater to different dietary considerations whether gluten-free, vegetarian, or even dairy-free.
Wrap Up
So, there you have it! From the pro tips to the creative variations , you now know how to make those delicious potato balls in the best way possible! Don’t be afraid to experiment and find your own twist on this classic!
These are the perfect snacks for game day, a cozy gathering, or just because you feel like treating yourself. the crunchy exterior and that cheesy middle? absolute bliss.
Remember, cooking can be about the flavors and the joy it brings to you and your loved ones. go ahead, get in the kitchen, and show those potato balls who’s boss!
Happy cooking, friend! Can't wait to hear how your batch turns out.
Frequently Asked Questions
What's the best way to make potato balls crispy?
To achieve that perfect crispy texture, make sure your oil is hot enough around 350°F (175°C) before frying. Chilling the potato balls for 30 minutes before frying also helps them hold their shape and achieve that golden crunch.
If you prefer a healthier option, you can bake them at 400°F (200°C) for a similar crispiness.
How to make potato balls without eggs?
If you need to skip the eggs in your potato balls, you can use a mixture of flour and water as a binding agent. Simply mix one tablespoon of flour with two tablespoons of water to create a paste that can help hold the breadcrumbs onto the potato balls during frying.
Can I make potato balls ahead of time?
Absolutely! You can prepare and chill the potato balls in advance. Just store them in the fridge for a few hours or overnight before frying to save time on your party day. Fry them just before serving for the best texture.
What’s a good alternative filling for potato balls?
While cheesy fillings like cheddar or mozzarella are classic, feel free to get creative! You can use sautéed vegetables, cooked minced meats, or even spicy jalapeños to kick it up a notch. The sky’s the limit when it comes to fillings, so swap out based on your preferences!
How to store leftover potato balls?
Leftover potato balls can be stored in an airtight container in the fridge for up to 3 days. To reheat, pop them in the oven at 375°F (190°C) for about 10-15 minutes to keep them crispy, or you can fry them again for that freshly made taste!
How to make potato balls vegan?
You can easily make potato balls vegan by omitting the cheese and using a plant based butter or oil instead. For a cheesy flavour, consider adding nutritional yeast or a vegan cheese alternative. Just remember to use a substitute for the egg in the coating as well!
Crispy Potato Balls With A Cheesy Twist

