Creamy Churned Vanilla Ice Cream
- Churned Vanilla Ice Cream | Easy & Delicious: A Love Story
- Essential Ingredients Guide: Building Blocks for Your Kitchen
- The Professional Cooking Method: A Guide to Churned Vanilla Ice Cream | Easy & Delicious
- Additional Recipe Information for Churned Vanilla Ice Cream | Easy & Delicious
- 📝 Recipe Card
Churned Vanilla Ice Cream | Easy & Delicious: A Love Story
You know that feeling when you're sitting outside on a hot summer day, and all you want is a scoop of something cold and creamy? yeah, i’ve been there too.
Honestly, nothing beats a bite of churned vanilla ice cream . it takes me back to my childhood, running through the sprinklers and begging my mom for a bowl after dinner.
Can you relate?
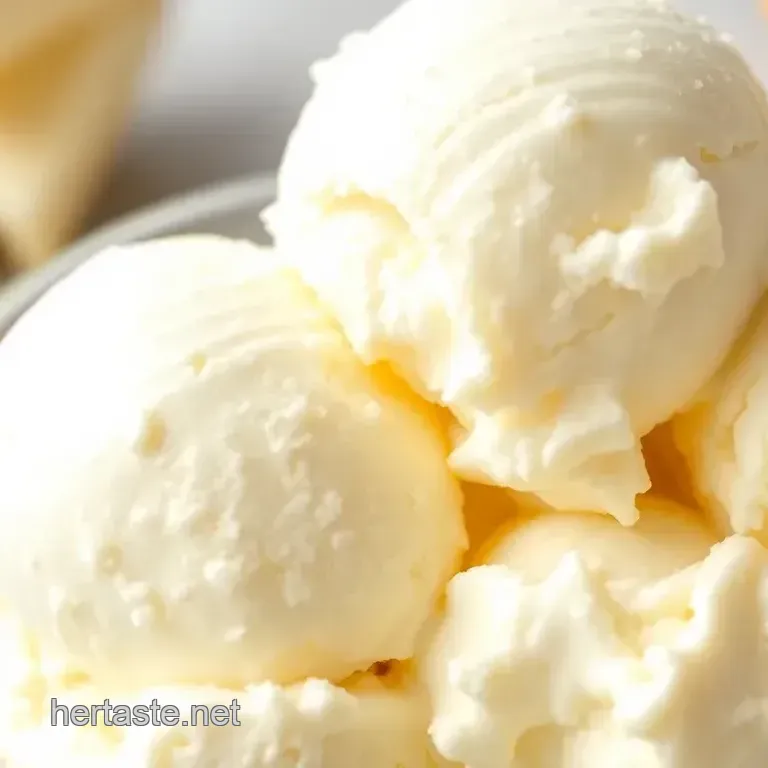
This vanilla ice cream recipe isn’t just any ordinary treat. it’s homemade , rich, and full of that irresistible vanilla flavor we all crave.
Made the classic way with a hint of french flair, it’s like a sweet hug on a cone (or in a bowl, if you prefer).
And the best part? it’s super easy to whip up! so, grab your mixing bowl, and let’s get churning!
From Tradition to Today
The history behind this creamy dessert is pretty cool. ice cream has been around since the 16th century, but the churned variety really got its start in france.
French ice cream is all about that silky smooth texture and a luxurious feel, thanks to its high cream content.
Isn’t it wild how a dessert can travel through time and still be a staple in kitchens today?
In our busy lives, homemade ice cream remains a popular choice. people love the idea of crafting something delicious in their own kitchen and let’s face it, it’s a total crowd pleaser!
whether it's a family gathering or just a casual night at home, this easy ice cream recipe will make you the star of the show.
Plus, it's not complex. you'll need an hour or so to prep and churn, but it’s worth every second.
Why You’ll Love This Recipe
I could go on about the deliciousness, but let’s break down why this churned ice cream rocks:
Health & nutrition: it does use cream, which is rich in calories, but it’s also a fantastic way to treat yourself without all those funky preservatives found in store-bought ice cream.
When you make your own, you know exactly what’s going in your bowl. just pure, creamy goodness!
Versatile and fun: this ice cream is perfect for all sorts of occasions from birthday parties to cozy family game nights.
And let’s not forget the fun of experimenting with ice cream toppings ! you could go traditional with sprinkles or get gourmet with fresh fruit or chocolate sauce yummy!
Easy to customize: want something a little different? go ahead and play around! you could mix in chocolate chips during the churning, or even swirl in some fruit puree for a fruity twist.
The sky's the limit when it comes to flavored ice cream ideas !
Ready to Jump In?
To get started with this deliciousness, you’ll need just a handful of ingredients. picture it: creamy heavy cream, rich whole milk, sugar, and the star of this show, pure vanilla extract (or if you're feeling fancy, a vanilla bean!).
It all comes together to create the dreamy ice cream base everyone loves.
Now, let’s not forget to chill that mixture for at least two hours before churning because it’s crucial for that creaminess we’re all dreaming about.
I don’t want to spill all the secrets just yet there's a whole world of ice cream making tips to discover! and trust me, once you make your first batch of this delicious dessert , you’ll never want to go back to store-bought again.
So, are you ready to dive into the world of homemade vanilla ice cream? grab your ice cream maker and let’s get rolling.
Next, we’ll go over all the tasty ingredients you’ll need to whip up this creamy treat!
Essential Ingredients Guide: Building Blocks for Your Kitchen

When you step into the kitchen, it’s like entering a craft shop. you need the right tools and materials to create something magical.
For those who love to whip up homemade treats like that delightful churned vanilla ice cream | easy & delicious that everyone goes crazy over it’s crucial to understand the essential ingredients to get that rich vanilla flavor just right!
Premium Core Components
Getting the basics down is super important. Let’s dive in.
Measurements: always remember to measure your ingredients! for the most part, the go-to for measurements will be in cups and tablespoons , but some recipes will call for grams and milliliters too.
For instance, when making that creamy vanilla ice cream base, you’ll need 2 cups of heavy cream and 1 cup of whole milk .
Quality indicators: not all ingredients are created equal. look for fresh cream you can tell it’s good if it has a rich smell and isn’t past the expiration date.
And when it comes to vanilla extract , pure is always the way to go. skip the artificial stuff if you want that gourmet flavor!
Storage guidelines: let’s face it not all ingredients have the same life span. for example, heavy cream can last about 1 week to 2 weeks in the fridge after opening, while sugar can practically last forever if stored properly.
Your aim should be to store your ingredients in a cool, dry place and always check dates!
Freshness tips: for best results, pick your ingredients carefully. always smell and taste your vanilla extract if you can, and ensure your dairy is fresh.
Companion herbs should look vibrant and fragrant when selecting.
Signature Seasoning Blend
Now let’s chat about what makes things flavorful. You think you just need sugar for ice cream? Oh, no, friend. Essential spice combinations come into play here!
Herb Selections: Beyond just vanilla, consider experimenting! You could throw in some lavender if you want something unique.
Flavor Enhancers: A pinch of salt or a dash of lemon can really brighten things up in desserts. Seriously, it’s magic!
Regional Variations: Want to switch it up? Try swapping out vanilla for cocoa powder to get a chocolatey twist or mix in some fresh mint for a refreshing summer treat. Why not?
Smart Substitutions
Let’s not forget about those tricky moments when you’re out of something.
Common Alternatives: If you’ve run out of heavy cream when making that creamy dessert, you can use half and-half for a lighter version.
Dietary Modifications: Have a dietary restriction? Almond or coconut milk works wonders as dairy alternatives for ice cream without sacrificing too much creamy goodness.
Emergency Replacements: Out of sugar? A little honey or agave syrup can save the day!
Seasonal Options: During summer, ripe peaches can be pureed into the base for a delightful fruity vanilla twist.
Kitchen Equipment Essentials
Okay, now that we’ve got our ingredients sorted, let’s look at the gear.
Must Have Tools: If you’re making homemade ice cream, you’ll definitely need an ice cream maker, mixing bowls, and a whisk . Trust me; they make life easier.
Alternative equipment options: no ice cream maker? no worries! you can pour your mixture into a shallow dish and stir it every 30 minutes until it’s frozen.
It’s a bit more labor intensive, but you’ll get there!
Preparation Tips: Make sure your mixing bowl and beaters are chilled before whipping cream this helps it whip up faster. It’s a little trick I learned that makes a big difference!
Let’s Get Ready to Make Some Ice Cream!
Now that you know what ingredients to gather and the essentials you need, we can dive right into making that churned vanilla ice cream you’ve been dreaming about! remember, a bit of patience and love goes a long way when it comes to crafting delicious desserts .
So, roll up your sleeves, and let's get to it!
The Professional Cooking Method: A Guide to Churned Vanilla Ice Cream | Easy & Delicious
When it comes to whipping up something sweet, few things hit the spot like churned vanilla ice cream . just thinking about it makes my heart skip a beat! now, let’s dive into the professional cooking methods that’ll help you nail this creamy treat.
Essential Preparation Steps
First things first, let’s talk about mise en place . it’s a fancy french term, but it basically means getting everything ready before you start cooking.
Measure out your ingredients: 2 cups of heavy cream , 1 cup of whole milk , 3/4 cup of sugar you get the idea.
This way, you don’t get caught scrambling while your ice cream mixture is heating up.
Next up is time management . set a timer for 30 minutes while your base is chilling in the fridge.
That’s when you can relax or maybe check your favorite show. trust me, it’s tempting to skip this, but chilling helps achieve that ultra creamy texture you crave.
Organization strategies are key. Keep your workspace tidy. I once spent half an hour looking for my whisk because I got lazy and left things lying around. So, keep it neat!
Don’t forget about safety considerations . no one wants to end up with burnt fingers from a hot saucepan! use oven mitts, and make sure your ice cream maker is on a stable surface.
step-by-step Process
Alright, let's break it down. Here’s how you can get started:
Prep the ice cream base : in a saucepan, simmer 2 cups of heavy cream , 1 cup of whole milk , and half of the sugar over medium heat.
This should take about 5- 7 minutes . watch for bubbling!
Add Flavor : Split that vanilla bean or just use pure vanilla extract . Stir it in and let the flavor bloom. This’ll deepen the rich vanilla flavor we’re all craving.
Sweeten It Up : After the mixture simmers, take it off the heat and let it steep for 30 minutes . This is when patience pays off!
Chill It Down : Transfer your mixture to the fridge for at least 2 hours . This step is crucial for that creamy goodness, buddy.
Churn Away : Once your base is chilled, pour it into the ice cream maker. Churn for about 20 minutes , or until it resembles a soft serve consistency.
Freeze It : Scoop that lush mixture into an airtight container and freeze for a minimum of 4 hours before diving in.
Expert Techniques
Now, let’s get into the nitty gritty.
Pay attention to temperature control . If your base is too warm, your ice cream will end up icy instead of creamy. We want smooth, dreamy dairy desserts , not ice chunks!
Timing precision is key here. And hey, visual cues for doneness? Look for a silky texture. You got this!
If you run into trouble, like your churned ice cream not thickening, check your temp. Often, it’s too warm.
Success Strategies
Let’s chat about success strategies, shall we?
Common mistakes to steer clear of: Over churning is a biggie! Stop churning once you see that soft serve vibe don’t let it get too hard!
Quality assurance tips mean using fresh ingredients. The better your ingredients, the better your ice cream will taste. Trust me, vanilla extract benefits from quality, organic beans!
Feel free to make-ahead options too! This ice cream base keeps well in the fridge for up to 2 days if you’re prepping early for a summer party.
Wrapping Up
Your homemade vanilla ice cream journey is just getting started! with these professional methods, you can confidently make your ice cream.
Imagine serving this to your fam or friends on a balmy evening, drizzled with chocolate sauce or added as a scoop on a pie.
As you dive into this creamy dream, don’t forget to experiment with ice cream variations as you go.
Stick around for additional information on how to adapt this recipe, including all sorts of fun flavor ideas! Let’s get that ice cream machine buzzing and unleash some delicious homemade goodness in your kitchen!
Additional Recipe Information for Churned Vanilla Ice Cream | Easy & Delicious
So, you’ve got yourself a delicious batch of churned vanilla ice cream . now what? let’s dive into some pro tips , presentation methods, storage solutions , awesome variations , and a complete nutrition guide to round out your ice cream experience.
Trust me, you’ll want this info in your back pocket!
Pro Tips & Secrets
First off, if you want to impress your friends and family, here are some chef approved secrets. start with fresh ingredients your heavy cream and vanilla are the stars here, so don't skimp! you want that rich vanilla flavor to shine.
Oh, and here’s a time saver: when heating the ice cream base, do it over medium heat and stay close. If you walk away, you might end up with burnt cream, and ain’t nobody got time for that!
For a flavor boost, consider adding a dash of almond extract. it pairs perfectly with vanilla for a unique spin.
And don’t forget: presentation matters! a sprinkle of sea salt on top can be life changing trust me.
Perfect Presentation
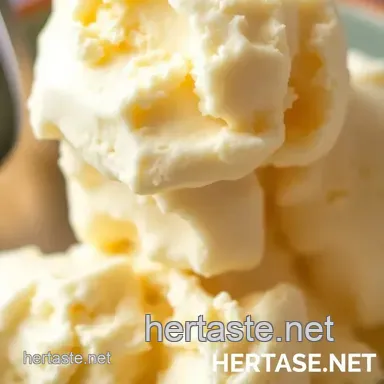
Now let's talk about plating. a scoop of your cream churned vanilla ice cream deserves a rad presentation, right? use a large scoop to create a clean, round ball.
Place it in a stylish bowl, maybe even ones with bright colors to show off that creamy dessert.
For garnish, think fresh mint leaves or seasonal fruits like berries. they’re not just pretty; they add a pop of color and freshness.
If you’re feeling fancy, drizzle some chocolate syrup or a bit of caramel sauce. when it comes to visual appeal , you eat with your eyes first!
Storage & make-ahead
Okay, so after all this delightful creation, let’s talk about storage. your homemade ice cream should be stored in an airtight container .
This will keep it fresh for about 2 weeks in the freezer. beyond that, while it might still taste okay, the texture will start to lose that beloved creaminess.
For reheating? well, you don’t actually reheat ice cream, but if it gets too hard, let it sit at room temperature for 5- 10 minutes before scooping.
This softens it just enough for easy serving.
Creative Variations
Here’s where the real fun kicks in. you can jazz up your ice cream variations in so many ways! for a seasonal twist, try adding crushed pumpkin pie spice during the churning process come fall.
Or maybe mix in some crushed cookies for a cookies and-cream vibe.
Got dietary needs? Swap out heavy cream for coconut cream for a vegan friendly option. You can even play around with flavored extracts like peppermint for the holidays or lemon for summer.
Complete Nutrition Guide
Now let’s not forget the nitty gritty what you’re actually eating! each serving of your vanilla ice cream recipe has about 380 calories .
It's got a good dose of fat, thanks to the cream, so enjoy it in moderation. but hey, you’re making it at home, and you can balance it with healthier toppings like fruit or even granola.
If you’re looking for a cozy dessert that fits into your lifestyle, just keep your portion sizes in check. Ice cream after dinner is a great treat; having some after every meal? Maybe not so much!
Expert FAQ Solutions
Got questions? i’ve been there, so let’s tackle those hiccups! if your ice cream turns out icy instead of creamy, it might be because it wasn’t chilled enough before churning, or you over churned it.
Keep an eye on your mixture!
If you’re experimenting with flavored ice cream ideas , remember to add those flavor elements in slowly. It’s always easier to add more, but tough to take away!
Conclusion
With these tips, tricks, and variations in hand, you'll become the ice cream wizard in your circle. experimenting with this easy and delicious churned vanilla ice cream recipe is all about the joy of creating your own creamy treats .
Whether you keep it classic or go wild with flavors, the important part is savoring it with friends and family.
So grab a spoon, dig in, and enjoy the sweet life your way!
Churned Vanilla Ice Cream Easy Delicious
Ingredients:
Instructions:
Nutrition Facts:
| Calories | 380 calories |
|---|---|
| Protein | 4 g |
| Fat | 28 g |
| Carbs | 30 g |
